An accessor is a method for getting or setting the value of an instance variable. An accessor that gets the instance variable’s value is called a getter; an accessor that sets the instance variable’s value is called a setter.
Accessors are important in part because instance variables, by default, are protected (Chapter 5), whereas publicly declared methods are public; without public accessor methods, a protected instance variable can’t be accessed by any object whose class (or superclass) isn’t the one that declares the instance variable. You might be tempted to conclude from this that you needn’t bother making an accessor for an instance variable that isn’t intended for public access, and to some extent this is a reasonable conclusion. But here are some counterarguments:
- Cocoa often uses the string name of an instance variable to derive the name of the accessor and call it if it exists. Thus there needs to be an accessor so that Cocoa can find it.
- If your app doesn’t use ARC, and if your instance variable is an object, there are going to be memory management tasks to worry about every time you get and (especially) set that value; the best way to ensure that you’re carrying out those tasks reliably and consistently is to pass through an accessor.
- Even if your app does use ARC, there may be additional tasks that need to be performed every time the instance variable’s value is touched; an accessor, acting as a gateway to the instance variable, ensures that these tasks are performed consistently.
- Making accessors is no bother, as you usually won’t have to write the code for an accessor; Objective-C can write your accessors for you.
This chapter will discuss all of those points in depth.
There are naming conventions for accessors, and you should obey them. The conventions are simple:
- The setter
-
A setter’s name should start with
set, followed by a capitalized version of the instance variable’s name (without an initial underscore if the instance variable has one). The setter should take one parameter — the new value to be assigned to the instance variable. Thus, the instance variable is namedmyVar(or_myVar), the setter should be namedsetMyVar:. - The getter
-
A getter should have the same name as the instance variable (without an initial underscore if the instance variable has one). This will not cause you or the compiler any confusion, because variable names and method names are used in completely different contexts. Thus, if the instance variable is named
myVar(or_myVar), the getter should be namedmyVar.If the instance variable’s value is a BOOL, you may optionally start the getter’s name with
is(for example, an ivarshowingor_showingcan have a getterisShowing), though in fact I never do this.
Note
Although I keep saying that the names of the accessor methods use the name of the instance variable, there is no law requiring that they use the name of a real instance variable. Quite the contrary: you might deliberately have methods myVar and setMyVar: when in fact there is no myVar (or _myVar) instance variable. Perhaps the accessors are masking the real name of the instance variable, or perhaps there is no instance variable at all, and these accessors are really doing something quite different behind the scenes. Accessors effectively present a façade, as if there were a certain instance variable, shielding the caller from any knowledge of the underlying details.
Cocoa derives the name of an accessor from a string name through a mechanism called key–value coding, or simply KVC. (See also Chapter 5, where I introduced key–value coding.) The key is a string (an NSString) that names the value to be accessed. The basis for key–value coding is the NSKeyValueCoding protocol, an informal protocol (it is actually a category) to which NSObject (and therefore every object) conforms. Key–value coding is a big subject; see the Key-Value Coding Programming Guide for full information.
The fundamental key–value coding methods are valueForKey: and setValue:forKey:. When one of these methods is called on an object, the object is introspected. In simplified terms, first the appropriate accessor is sought; if it doesn’t exist, the instance variable is accessed directly.
So, for example, suppose the call is this:
[myObject setValue:@"Hello" forKey:@"greeting"];
First, a method setGreeting: is sought in myObject; if it exists, it is called, passing @"Hello" as its argument. If that fails, but if myObject has an instance variable called greeting (or _greeting), the value @"Hello" is assigned directly to that ivar.
Warning
The key–value coding mechanism can bypass completely the privacy of an instance variable! Cocoa knows that you might not want to allow that, so a class method accessInstanceVariablesDirectly is supplied, which you can override to return NO (the default is YES).
Both valueForKey: and setValue:forKey: require an object as the value. Your accessor’s signature (or, if there is no accessor, the instance variable itself) might not use an object as the value, so the key–value coding mechanism converts for you. Numeric types (including BOOL) are expressed as an NSNumber; other types (such as CGRect and CGPoint) are expressed as an NSValue.
Note
A class is key–value coding compliant (or KVC compliant) on a given key if it implements the methods, or possesses the instance variable, required for access via that key.
Another useful pair of methods is dictionaryWithValuesForKeys: and setValuesForKeysWithDictionary:, which allow you to get and set multiple key–value pairs by way of an NSDictionary with a single command.
KVC is extremely dynamic. It allows you, in effect, to decide at runtime what instance variable to access; you obtain the instance variable’s name as an NSString and pass that to valueForKey: or setValue:forKey:. Thus, by using an NSString instead of an instance variable or method name, you’re throwing away compile-time checking as to the message you’re sending. Moreover, key–value coding is agnostic about the actual class of the object you’re talking to; you can send valueForKey: to any object and successfully get a result, provided the class of that object is key–value coding compliant for that key, so you’re throwing away compile-time checking as to the object you’re sending the message to. These are both strong advantages of key–value coding, and I often find myself using it because of them.
Here’s an example of key–value coding used in my own code on my own object. In a flashcard app, I have a class Term, representing a Latin term, that defines many instance variables. Each card displays one term, with its instance variables shown in different text fields. If the user taps any of three text fields, I want the interface to change from the term that’s currently showing to the next term whose value is different for the instance variable that this text field represents. Thus this code is the same for all three text fields; the only difference is what instance variable to consider as we hunt for the term to be displayed. By far the simplest way to express this is through key–value coding:
NSInteger tag = g.view.tag; // the tag tells us which text field was tapped
NSString* key = nil;
switch (tag) {
    case 1: key = @"lesson"; break;
    case 2: key = @"lessonSection"; break;
    case 3: key = @"lessonSectionPartFirstWord"; break;
}
// get current value of corresponding instance variable
NSString* curValue = [[self currentCardController].term valueForKey: key];
// ...
A number of built-in Cocoa classes permit you to use key–value coding in a special way. For example:
-
If you send
valueForKey:to an NSArray, it sendsvalueForKey:to each of its elements and returns a new array consisting of the results, an elegant shorthand (and a kind of poor man’smap). NSSet behaves similarly. -
NSSortDescriptor sorts an NSArray by sending
valueForKey:to each of its elements. -
NSDictionary implements
valueForKey:as an alternative toobjectForKey:(useful particularly if you have an NSArray of dictionaries). Similarly, NSMutableDictionary treatssetValue:forKey:as a synonym forsetObject:forKey:, except thatvalue:can be nil, in which caseremoveObject:forKey:is called. - CALayer (Chapter 16) and CAAnimation (Chapter 17) permit you to use key–value coding to define and retrieve the values for arbitrary keys, as if they were a kind of dictionary; this is useful for attaching identifying and configuration information to one of these instances.
-
NSManagedObject, used in conjunction with Core Data (Chapter 36), is guaranteed to be key–value coding compliant for attributes you’ve configured in the entity model. Therefore, it’s common to access those attributes with
valueForKey:andsetValue:forKey:.
Key–value coding lies at the basis of how outlet connections work. I said in Chapter 7 that the name of the outlet in the nib is matched to the name of an instance variable, but I waved my hands over how this matching is performed. The truth is that key–value coding is used. The name of the outlet in the nib is a string. Key–value coding turns the string into a hunt for appropriate accessors.
Suppose you have a class MyClass with an instance variable myVar, and you’ve drawn a myVar outlet from that class’s representative in the nib to an OtherClass nib object. When the nib loads, the outlet name myVar is translated to the method name setMyVar:, and your MyClass instance’s setMyVar: method, if it exists, is called with the OtherClass instance as its parameter, thus setting the value of your MyClass instance’s instance variable to the OtherClass instance (Figure 7.5).
By the same token, you should not use accessor names for methods that aren’t accessors! For example, you probably would not want MyClass to have a method called setMyVar: if it is not the accessor for myVar. If it did have such a method, it would be called when the nib loads, the OtherClass instance would be passed to it, and the OtherClass instance would not be assigned to the myVar instance variable! As a result, references in your code to myVar would be references to nil.
On the other hand, an attempt to access a nonexistent key through key–value coding will result, by default, in a crash at runtime, with an error message of this form: “This class is not key value coding-compliant for the key myKey.” The lack of quotation marks around the word after “the key” has misled many a beginner, so remember: the last word in that error message is the name of the key that gave Cocoa trouble. A common way to encounter this error message is to change the name of an instance variable so that the name of an outlet in a nib no longer matches it; at runtime, when the nib loads, Cocoa will attempt to use key–value coding to set a value in your object based on the name of the outlet, will fail (because there is no longer an instance variable or accessor by that name), and will generate this error.
A key path allows you to chain keys in a single expression. If an object is key–value coding compliant for a certain key, and if the value of that key is itself an object that is key–value coding compliant for another key, you can chain those keys by calling valueForKeyPath: and setValue:forKeyPath:. A key path string looks like a succession of key names joined with a dot (.). For example, valueForKeyPath:@"key1.key2" effectively calls valueForKey: on the message receiver, with @"key1" as the key, and then takes the object returned from that call and calls valueForKey: on that object, with @"key2" as the key.
To illustrate this shorthand, imagine that our object myObject has an instance variable theData which is an array of dictionaries such that each dictionary has a name key and a description key. I’ll show you the actual value of theData as displayed by NSLog:
(
    {
        description = "The one with glasses.";
        name = Manny;
    },
    {
        description = "Looks a little like Governor Dewey.";
        name = Moe;
    },
    {
        description = "The one without a mustache.";
        name = Jack;
    }
)
Then [myObject valueForKeyPath: @"theData.name"] returns an array consisting of the strings @"Manny", @"Moe", and @"Jack". If you don’t understand why, review what I said a few paragraphs ago about how NSArray and NSDictionary implement valueForKey:.
Key–value coding also allows an object to implement a key as if its value were an array (or a set), even if it isn’t. This is similar to what I said earlier about how accessors function as a façade, putting an instance variable name in front of hidden complexities. To illustrate, I’ll add these methods to the class of our object myObject:
- (NSUInteger) countOfPepBoys {
    return [self.theData count];
}

- (id) objectInPepBoysAtIndex: (NSUInteger) ix {
    return (self.theData)[ix];
}
By implementing countOf... and objectIn...AtIndex:, I’m telling the key–value coding system to act as if the given key (@"pepBoys" in this case) existed and were an array. An attempt to fetch the value of the key @"pepBoys" by way of key–value coding will succeed, and will return an object that can be treated as an array, though in fact it is a proxy object (an NSKeyValueArray). Thus we can now say [myObject valueForKey: @"pepBoys"] to obtain this array proxy, and we can say [myObject valueForKeyPath: @"pepBoys.name"] to get the same array of strings as before. This particular example may seem a little silly because the underlying implementation is already an array instance variable, but you can imagine an implementation whereby the result of objectInPepBoysAtIndex: is obtained through some completely different sort of operation.
The proxy object returned through this sort of façade behaves like an NSArray, not like an NSMutableArray. If you want the caller to be able to manipulate the proxy object provided by a KVC façade as if it were a mutable array, you must implement two more methods, and you must obtain a different proxy object by calling mutableArrayValueForKey:. So, for example:
- (void) insertObject: (id) val inPepBoysAtIndex: (NSUInteger) ix {
    [self.theData insertObject:val atIndex:ix];
}

- (void) removeObjectFromPepBoysAtIndex: (NSUInteger) ix {
    [self.theData removeObjectAtIndex: ix];
}
Now you can call [myObject mutableArrayValueForKey: @"pepBoys"] to obtain something that acts like a mutable array. (The true usefulness of mutableArrayValueForKey: will be clearer when we talk about key–value observing in Chapter 13.)
A complication for the programmer is that none of these methods can be looked up directly in the documentation, because they involve key names that are specific to your object.
You can’t find out from the documentation what removeObjectFromPepBoysAtIndex: is for; you have to know, in some other way, that it is part of the implementation of key–value coding compliance for a key @"pepBoys" that can be obtained as a mutable array. Be sure to comment your code so that you’ll be able to understand it later. Another complication, of course, is that getting a method name wrong can cause your object not to be key–value coding compliant. Figuring out why things aren’t working as expected in a case like that can be tricky.
It comes as a surprise to many beginning Cocoa coders that the programmer has an important role to play in the explicit management of memory. What’s more, managing memory incorrectly is probably the most frequent cause of crashes — or, inversely, of memory leakage, whereby your app’s use of memory increases relentlessly until, in the worst-case scenario, there’s no memory left.
Fortunately, if your app uses ARC, your explicit memory management responsibilities can be greatly reduced, which is a tremendous relief, as you are far less likely to make a mistake, and more of your time is liberated to concentrate on what your app actually does instead of dealing with memory management concerns. But even with ARC it is still possible to make a memory management mistake (I speak from personal experience), so you still need to understand Cocoa memory management, so that you know what ARC is doing for you, and so that you know how to interface with ARC in situations where it needs your assistance. Do not, therefore, suppose that you don’t need to read this section on the grounds that you’re going to be using ARC.
The reason why memory must be managed at all is that object references are pointers. As I explained in Chapter 1, the pointers themselves are simple C values (basically they are just integers) and are managed automatically, whereas what an object pointer points to is a hunk of memory that must explicitly be set aside when the object is brought into existence and that must explicitly be freed up when the object goes out of existence. We already know how the memory is set aside — that is what alloc does. But how is this memory to be freed up, and when should it happen?
At the very least, an object should certainly go out of existence when no other objects exist that have a pointer to it. An object without a pointer to it is useless; it is occupying memory, but no other object has, or can ever get, a reference to it. This is a memory leak. Many computer languages solve this problem through a policy called garbage collection. Simply put, the language prevents memory leaks by periodically sweeping through a central list of all objects and destroying those to which no pointer exists. But affixing a form of garbage collection to Objective-C would be an inappropriately expensive strategy on an iOS device, where memory is strictly limited and the processor is relatively slow (and may have only a single core). Thus, memory in iOS must be managed more or less manually.
But manual memory management is no piece of cake, because an object must go out existence neither too late nor too soon. Suppose we endow the language with the ability for one object to command that another object go out of existence now, this instant. But multiple objects can have a pointer (a reference) to the very same object. If both the object Manny and the object Moe have a pointer to the object Jack, and if Manny tells Jack to go out of existence now, poor old Moe is left with a pointer to nothing (or worse, to garbage). A pointer whose object has been destroyed behind the pointer’s back is a dangling pointer. If Moe subsequently uses that dangling pointer to send a message to the object that it thinks is there, the app will crash.
To prevent both dangling pointers and memory leakage, Objective-C and Cocoa implement a policy of manual memory management based on a number, maintained by every object, called its retain count. Other objects can increment or decrement an object’s retain count. As long as an object’s retain count is positive, the object will persist. No object has the direct power to tell another object to be destroyed; rather, as soon as an object’s retain count is decremented to zero, it is destroyed automatically.
By this policy, every object that needs Jack to persist should increment Jack’s retain count, and should decrement it once again when it no longer needs Jack to persist. As long as all objects are well-behaved in accordance with this policy, the problem of manual memory management is effectively solved:
- There cannot be any dangling pointers, because any object that has a pointer to Jack has incremented Jack’s retain count, thus ensuring that Jack persists.
- There cannot be any memory leaks, because any object that no longer needs Jack decrements Jack’s retain count, thus ensuring that eventually Jack will go out of existence (when the retain count reaches zero, indicating that no object needs Jack any longer).
Obviously, all of this depends upon all objects cooperating in obedience to this memory management policy. Cocoa’s objects (objects that are instances of built-in Cocoa classes) are well-behaved in this regard, but you must make sure your objects are well-behaved. Before ARC, ensuring that your objects were well-behaved was entirely up to you and your explicit code; under ARC, your objects will be well-behaved more or less automatically, provided you understand how to cooperate with ARC’s automated behavior.
An object is well-behaved with respect to memory management as long as it adheres to certain very simple rules in conformity with the basic concepts of memory management outlined in the previous section.
Before I tell you the rules, it may help if I remind you (because this is confusing to beginners) that a variable name, including an instance variable, is just a pointer. When you send a message to that pointer, you are really sending a message through that pointer, to the object to which it points. The rules for memory management are rules about objects, not names, references, or pointers. You cannot increment or decrement the retain count of a pointer; there is no such thing. The memory occupied by the pointer is managed automatically (and is tiny). Memory management is concerned with the object to which the pointer points.
(That is why I’ve referred to my example objects by proper names — Manny, Moe, and Jack — and not by variable names. The question of who has retained Jack has nothing to do with the name by which any particular object refers to Jack.)
The two things are easily confused, especially because — as I’ve often pointed out in earlier chapters — the variable name pointing to an object is so often treated as the object that there is a tendency to think that it is the object. It’s clumsy, in fact, to distinguish the name from the object it points to. But in discussing memory management, I’ll try to maintain that distinction.
Here, then, are the golden rules of Cocoa memory management:
-
To increment the retain count of any object, send it the
retainmessage. This is called retaining the object. The object is now guaranteed to persist at least until its retain count is decremented once more. To make this a little more convenient, aretaincall returns as its value the retained object — that is,[myObject retain]returns the object pointed to bymyObject, but with its retain count incremented. -
When you (meaning a certain object) say
allocto a class — ornew, which is a way of sayingalloc— the resulting instance comes into the world with its retain count already incremented. You do not need to retain an object you’ve just instantiated by sayingallocornew(and you should not). Similarly, when you saycopyto an instance, the resulting new object (the copy) comes into the world with its retain count already incremented. You do not need to retain an object you’ve just instantiated by sayingcopy(and you should not). -
To decrement the retain count of any object, send it the
releasemessage. This is called releasing the object. If you (meaning a certain object) obtained an object by sayingallocorcopy, or if you saidretainto an object, you (meaning the same object) should balance this eventually by sayingreleaseto that object, once. You should assume that thereafter the object no longer exists.
A general way of understanding the golden rules of Cocoa memory management is to think in terms of ownership. If Manny has said alloc, retain, or copy with regard to Jack, Manny has asserted ownership of Jack. More than one object can own Jack at once, but each such object is responsible only for managing its own ownership of Jack correctly. It is the responsibility of an owner of Jack eventually to release Jack, and a nonowner of Jack must never release Jack. As long as all objects that ever take ownership of Jack behave this way, Jack will not leak nor will any pointer to Jack be left dangling.
Now, under ARC, as I shall explain presently in more detail, these rules remain exactly the same, but they are obeyed for you in an automated fashion by the compiler. In an ARC-based app, you never say retain or release — in fact, you’re not allowed to. Instead, the compiler says retain or release for you, using exactly the principles you would have had to use if you had said them (the golden rules of Cocoa memory management)! Since the compiler is smarter (or at least more ruthlessly tenacious) than you are about this sort of nit-picky rule-based behavior, it won’t make any of the mistakes you might have made due to carelessness or confusion.
The moment an object is released, there is a chance it will be destroyed. Before ARC, this fact was a big worry for programmers. In a non-ARC program, you must take care not to send any messages subsequently through any pointer to an object that has been destroyed — including the pointer you just used to release the object. In effect, you’ve just turned your own pointer into a possible dangling pointer! If there is any danger that you might accidentally attempt to use this dangling pointer, a wise policy is to nilify the pointer — that is, to set the pointer itself to nil. A message to nil has no effect, so if you do send a message through that pointer, it won’t do any good, but at least it won’t do any harm (kind of like chicken soup).
In an ARC-based program, this policy, too, is strictly followed: ARC will nilify for you any pointer to whose object it has just sent the last balancing release message (meaning that the object might now have gone out of existence). Since, as I mentioned in Chapter 3, ARC also sets an instance pointer to nil when you declare it (if you don’t initialize it yourself, there and then, to point to an actual instance), there follows as the night the day the following delightful corollary: under ARC, every instance pointer either points to an actual instance or is nil. This fact alone should send you rushing to convert all your existing non-ARC apps to ARC if you possibly can.
When you create a new Xcode project and choose an application template, a checkbox in the second dialog lets you elect to Use Automatic Reference Counting. Automatic Reference Counting is ARC. If this checkbox is checked, then (among other things):
-
The LLVM compiler build setting Objective-C Automatic Reference Counting (
CLANG_ENABLE_OBJC_ARC) for your project is set to YES. -
Any
retainorreleasestatements that would have been present in the non-ARC version of any of the project template’s .m files are stripped out. - Any code that Xcode subsequently inserts automatically, such as a property generated by Control-dragging from a nib into code, will conform to ARC conventions.
It is also possible to convert an existing non-ARC project to ARC; choose Edit → Refactor → Convert to Objective-C ARC for assistance with the necessary code changes. You do not have to adopt ARC for an entire project; if you have old non-ARC code, possibly written by someone else, you may wish to incorporate that code into your ARC-based project without substantially altering the non-ARC code. To do so, confine all non-ARC code to its own files, and for each of those files, edit the target, switch to the Build Phases tab, and in the Compile Sources section, double-click the non-ARC file’s listing and type -fno-objc-arc in the box (to enter it in the Compiler Flags column).
Note
ARC is actually a feature of LLVM 3.0 and later, and is one of the main purposes for which the LLVM compiler was developed. For full technical information, see http://clang.llvm.org/docs/AutomaticReferenceCounting.html.
When you compile an ARC-based project, the compiler will treat any explicit retain or release commands as an error, and will instead, behind the scenes, insert its own commands that effectively do the exact same work as retain and release commands. Your code is thus manually memory-managed, in conformity with the principles and golden rules of manual memory management that I’ve already described, but the author of the manual memory-management code is the compiler (and the memory-management code itself is invisible, unless you feel like reading assembly language).
ARC does its work of inserting retain and release commands in two stages:
- It behaves very, very conservatively; basically, if in doubt, it retains — and of course it later releases. In effect, ARC retains at every juncture that might have the slightest implications for memory management: it retains when an object is received as an argument, it retains when an object is assigned to a variable, and so forth. It may even insert temporary variables to enable it to refer sufficiently early to an object so that it can retain it. But of course it also releases to match. This means that at the end of the first stage, memory management is technically correct; there may be far more retains and releases on a single object than you would have put if you were writing those commands yourself, but at least you can be confident that no pointer will dangle and no object will leak.
-
It optimizes, removing as many
retainandreleasepairs from each object as it possibly can while still ensuring safety with regard to the program’s actual behavior. This means that at the end of the second stage, memory management is still technically correct, and it is also efficient.
So, for example, consider the following code:
- (void) myMethod {
    NSArray* myArray = [NSArray array];
    NSArray* myOtherArray = myArray;
}
Now, in actual fact, no additional memory management code is needed here (for reasons that I’ll clarify in the next section). But in its first pass, we may imagine that ARC will behave very, very conservatively: it will ensure that every variable is nil or points to an object, and it will retain every value as it is assigned to a variable, at the same time releasing the value previously pointed to by the variable being assigned to, on the assumption that it previously retained that value when assigning it to that variable as well. So we may imagine (though this is unlikely to be exactly correct) a scenario where ARC compiles that code at first into the equivalent of Example 12.1.
Example 12.1. Imaginary scenario: ARC’s conservative memory management
- (void) myMethod {
    // create all new object pointers as nil
    NSArray* myArray = nil;
    // retain as you assign, release the previous value
    id temp1 = myArray;
    myArray = [NSArray array];
    [myArray retain];
    [temp1 release]; // (no effect, it's nil)
    // create all new object pointers as nil
    NSArray* myOtherArray = nil;
    // retain as you assign, release the previous value
    id temp2 = myOtherArray;
    myOtherArray = myArray;
    [myOtherArray retain];
    [temp2 release]; // (no effect, it's nil)
    // method is ending, balance out retains on local variables
    [myArray release];
    myArray = nil;
    [myOtherArray release];
    myOtherArray = nil;
}
The ARC optimizer will then come along and reduce the amount of work being done here. For example, it may observe that myArray and myOtherArray turn out to be pointers to the same object, so it may therefore remove some of the intermediate retains and releases. And it may observe that there’s no need to send release to nil. But retains and releases are so efficient under ARC that it wouldn’t much matter if the optimizer didn’t remove any of the intermediate retains and releases.
But there’s more to the manual memory management balancing act than matching retain and release: in particular, I said earlier that alloc and copy yielded objects whose retain count had already been incremented, so that they, too, must be balanced by release. In order to obey this part of the golden rules of Cocoa memory management, ARC resorts to assumptions about how methods are named. This means that you had better conform, in your code, to the same assumptions about how methods are named, or you can accidentally cause ARC to do the wrong things (although, as it turns out, there are ways out of this predicament if you have a wrongly-named method whose name you absolutely can’t change).
In particular, when your code receives an object as the returned value of a method call, ARC looks at the opening word (or words) of the camelCased method name. (The term camelCased describes a compound word whose individual words are demarcated by internal capitalization, like the words “camel” and “Cased” in the word “camelCased.”) If the opening word of the name of that method is alloc, init, new, copy, or mutableCopy, ARC assumes that the object it returns comes with an incremented retain count that will need to be balanced with a corresponding release.
So, in the preceding example, if the array had been received from a call to [NSArray new] instead of [NSArray array], ARC would know that an extra release will be needed, to balance the incremented retain count of the object returned from a method whose name begins with new.
Your own responsibility in this regard, then, is not to name any of your methods inappropriately in such a way as to set off that sort of alarm bell in ARC’s head. The easiest approach is not to start any of your own method names with alloc, init (unless you’re writing an initializer, of course), new, copy, or mutableCopy. Doing so might not cause any damage, but it is better not to take the risk: obey the ARC naming conventions if you possibly can.
Built-in Cocoa objects will take ownership of objects you hand them, by retaining them, if it makes sense for them to do so. (Indeed, this is so generally true that if a Cocoa object is not going to retain an object you hand it, there will be a note to that effect in the documentation.) Thus, you don’t need to worry about managing memory for an object if the only thing you’re going to do with it is hand it over to a Cocoa object.
A good example is an NSArray. Consider the following minimal example:
NSString* s = [[NSDate date] description];
NSArray* arr = [NSArray arrayWithObject: s];
When you hand the string to the array, the array retains the string. As long as the array exists and the string is in the array, the string will exist. When the array goes out of existence, if the string is still in the array, the array will also release the string; if no other object is retaining the string, the string will then go out of existence in good order, without leaking, and all will be well. All of this is right and proper; the array could hardly “contain” the string without taking ownership of it.
An NSMutableArray works the same way, with additions. When you add an object to an NSMutableArray, the array retains it. When you remove an object from an NSMutableArray, the array releases it. Again, the array is always doing the right thing.
Thus you should stay out of, and not worry yourself about, memory management for objects you don’t own; the right thing will happen all by itself. For instance, look back at Example 10.2. Here it is again:
NSString* f = [[NSBundle mainBundle] pathForResource:@"index" ofType:@"txt"];
NSError* err = nil;
NSString* s = [NSString stringWithContentsOfFile:f
                                        encoding:NSUTF8StringEncoding
                                           error:&err];
// error-checking omitted
NSMutableDictionary* d = [NSMutableDictionary dictionary];
for (NSString* line in [s componentsSeparatedByString:@"\n"]) {
    NSArray* items = [line componentsSeparatedByString:@"\t"];
    NSInteger chnum = [items[0] integerValue];
    NSNumber* key = @(chnum);
    NSMutableArray* marr = d[key];
    if (!marr) { // no such key, create key–value pair
        marr = [NSMutableArray array];
        d[key] = marr;
    }
    // marr is now a mutable array, empty or otherwise
    NSString* picname = items[1];
    [marr addObject: picname];
}
No explicit memory management is happening here, and no additional memory management needs to happen (even if you aren’t using ARC). We’re generating a lot of objects, but never do we say alloc (or copy), so we have no ownership, and memory management is therefore not our concern. Moreover, no bad thing is going to happen between one line and the next while this code is running. The mutable dictionary d, for example, generated by calling [NSMutableDictionary dictionary], is not going to vanish mysteriously before we can finish adding objects to it. (I’ll say a bit more, later in this chapter, about why I’m so confident of this.)
On the other hand, it is possible (if you aren’t using ARC) to be tripped up by how Cocoa objects manage memory. Consider the following:
NSString* s = myMutableArray[0];
[myMutableArray removeObjectAtIndex: 0]; // bad idea! (but just fine under ARC)
Here we remove a string from an array, keeping a reference to it ourselves as s. But, as I just said, when you remove an object from an NSMutableArray, the array releases it. So the commented line of code in the previous example involves an implicit release of the string in question, and if this reduces the string’s retain count to zero, it will be destroyed. In effect, we’ve just done the thing I warned you about earlier: we’ve turned our own pointer s into a possible dangling pointer, and a crash may be in our future when we try to use it as if it were a string.
The way to ensure against such possible destruction in non-ARC code is to retain the object before doing anything that might destroy it (Example 12.2).
Example 12.2. How non-ARC code ensures a collection element’s persistence
NSString* s = myMutableArray[0];
[s retain]; // this is non-ARC code
[myMutableArray removeObjectAtIndex: 0];
Of course, now you have made management of this object your business; you have asserted ownership of it, and must make sure that this retain is eventually balanced by a subsequent release, or the string object may leak.
However, the very same code works perfectly under ARC:
NSString* s = myMutableArray[0];
[myMutableArray removeObjectAtIndex: 0]; // Just fine under ARC
The reason is that, as I mentioned earlier, ARC is insanely conservative at the outset. Just as in Example 12.1, ARC retains on assignment, so we may imagine that ARC will operate according to something like the imaginary scenario shown in Example 12.3.
Example 12.3. Imaginary scenario: ARC ensures a collection element’s persistence
NSString* s = nil;
// retain as you assign, release the previous value
id temp = s;
s = myMutableArray[0];
[s retain];
[temp release]; // (no effect, it's nil)
// and now this move is safe
[myMutableArray removeObjectAtIndex: 0];
// ... and later ...
[s release];
s = nil;
This turns out to be exactly the right thing to do! When the call to removeObjectAtIndex: comes along, the retain count of the object received from the array is still incremented, exactly as in our non-ARC Example 12.2.
When you call a method and receive as a result what Chapter 5 calls a ready-made instance, how does memory management work? Consider, for example, this code:
NSArray* myArray = [NSArray array];
According to the golden rules of memory management, the object now pointed to by myArray doesn’t need memory management. You didn’t say alloc in order to get it, so you haven’t claimed ownership of it and you don’t need to release it (and shouldn’t do so). But how is this possible? How is the NSArray class able to vend an array that you don’t have to release without also leaking that object?
If you don’t see why this is mysterious, pretend that you are NSArray. How would you implement the array method so as to generate an array that the caller doesn’t have to memory-manage? Don’t say that you’d just call some other NSArray method that vends a ready-made instance; that merely pushes the same problem back one level. You are NSArray. Sooner or later, you must somehow supply this magical instance. Ultimately you will have to generate the instance from scratch, and then how will you manage its memory? You can’t do it like this:
- (NSArray*) array {
    NSArray* arr = [[NSArray alloc] init];
    return arr; // hmmm, not so fast...
}
This, it appears, can’t work. On the one hand, we generated arr’s value by saying alloc. This means we must release the object pointed to by arr. On the other hand, when are we going to do this? If we do it just before returning arr, arr will be pointing to garbage and we will be vending garbage. We cannot do it just after returning arr, because our method exits when we say return. This is a puzzle. It is our job, if we are to be a good Cocoa citizen and follow the golden rules of memory management, to decrement the retain count of this object. We need a way to vend this object without decrementing its retain count now (so that it stays in existence long enough for the caller to receive and work with it), yet ensure that we will decrement its retain count (to balance our alloc call and fulfill our own management of this object’s memory).
The solution, which is explicit in pre-ARC code, is autorelease:
- (NSArray*) array {
    NSArray* arr = [[NSArray alloc] init];
    [arr autorelease];
    return arr;
}
Or, because autorelease returns the object to which it sent, we can condense that:
- (NSArray*) array {
    NSArray* arr = [[NSArray alloc] init];
    return [arr autorelease];
}
Here’s how autorelease works. Your code runs in the presence of something called an autorelease pool. (If you look in main.m, you can actually see an autorelease pool being created.) When you send autorelease to an object, that object is placed in the autorelease pool, and a number is incremented saying how many times this object has been placed in this autorelease pool. From time to time, when nothing else is going on, the autorelease pool is automatically drained. This means that the autorelease pool sends release to each of its objects, the same number of times as that object was placed in this autorelease pool, and empties itself of all objects. If that causes an object’s retain count to be zero, fine; the object is destroyed in the usual way. So autorelease is just like release — effectively, it is a form of release — but with a proviso, “later, not right this second.”
You don’t need to know exactly when the current autorelease pool will be drained; indeed, you can’t know (unless you force it, as we shall see). The important thing is that in a case like our method array, there will be plenty of time for whoever called array to retain the vended object if desired.
The vended object in a case like our method array is called an autoreleased object. The object that is doing the vending has in fact completed its memory management of the vended object. The vended object thus potentially has a zero retain count. But it doesn’t have a zero retain count just yet. The vended object is not going to vanish right this second, just after your call to [NSArray array], because your code is still running and so the autorelease pool is not going to be drained right this second. The recipient of such an object needs to bear in mind that this object may be autoreleased. The object won’t vanish while the code that called the method that vended the object is running, but if the receiving object wants to be sure that the vended object will persist later on, it should retain it.
This explains why there’s no explicit memory management in Example 10.2 (cited earlier in this chapter): we don’t madly retain every object we obtain in that code, even in non-ARC code, because those objects will all persist long enough for our code to finish. This fits with the golden rules of memory management. An object you receive by means other than those listed among the golden rules as asserting ownership (alloc or copy) isn’t under your ownership. The object will either be owned and retained by some other persistent object, in which case it won’t vanish while the other object persists, or it will be independent but autoreleased, in which case it will at least persist while your code continues to run. If you want it to persist and you’re afraid it might not, you should take ownership of it by retaining it.
Under ARC, as you might expect, all the right things happen of their own accord. You don’t have to say autorelease, and indeed you cannot. Instead, ARC will say it for you. And it says it in accordance with the method naming rule I described earlier. A method called array, for example, does not start with a camelCase unit new, init, alloc, copy, or mutableCopy. Therefore it must return an object whose memory management is balanced, using autorelease for the last release. ARC will see to it that this is indeed the case. On the other side of the ledger, the method that called array and received an array in return must assume that this object is autoreleased and could go out of existence if we don’t retain it. That’s exactly what ARC does assume.
Sometimes you may wish to drain the autorelease pool immediately. Consider the following:
for (NSString* aWord in myArray) {
    NSString* lowerAndShorter = [[aWord lowercaseString] substringFromIndex:1];
    [myMutableArray addObject: lowerAndShorter];
}
Every time through that loop, two objects are added to the autorelease pool: the lowercase version of the string we start with, and the shortened version of that. The first object, the lowercase version of the string, is purely an intermediate object: as the current iteration of the loop ends, no one except the autorelease pool has a pointer to it. If this loop had very many repetitions, or if these intermediate objects were themselves very large in size, this could add up to a lot of memory. These intermediate objects will all be released when the autorelease pool drains, so they are not leaking; nevertheless, they are accumulating in memory, and in certain cases there could be a danger that we will run out of memory before the autorelease pool drains. The problem can be even more acute than you know, because you might repeatedly call a built-in Cocoa method that itself accumulates a lot of intermediate objects.
The solution is to intervene in the autorelease pool mechanism by supplying your own autorelease pool. This works because the autorelease pool used to store an autoreleased object is the most recently created pool. So you can just create an autorelease pool at the top of the loop and drain it at the bottom of the loop, each time through the loop. In modern Objective-C, the notation for doing this is to surround the code that is to run under its own autorelease pool with the directive @autoreleasepool{}, like this:
for (NSString* aWord in myArray) {
    @autoreleasepool {
        NSString* lowerAndShorter =
            [[aWord lowercaseString] substringFromIndex:1];
        [myMutableArray addObject: lowerAndShorter];
    }
}
Many classes provide the programmer with two equivalent ways to obtain an object: either an autoreleased object or an object that you create yourself with alloc and some form of init. So, for example, NSArray supplies both the class method arrayWithObjects: and the instance method initWithObjects:. Which should you use? Before ARC, Apple stated that they would prefer you to lean toward initWithObjects:. In general, where you can generate an object with alloc and some form of init, they’d like you to do so. That way, you are in charge of releasing the object. This policy prevents your objects from hanging around in the autorelease pool and keeps your use of memory as low as possible. Under ARC, I still tend to adhere to this policy from force of habit, but in fact the ARC autorelease pool architecture is so efficient that the old policy may no longer provide any advantage.
Before ARC, the main place for the programmer to make a memory management mistake was with respect to instance variables. Memory management of temporary variables within a single method is pretty easy; you can see the whole method at once, so now just follow the golden rules of memory management, balancing every retain, alloc, or copy with a release (or, if you’re returning an object with an incremented retain count, autorelease). But instance variables make things complicated, for many reasons:
- Instance variables are persistent. Your own instance variables will persist when this method is over and your code has stopped running and the autorelease pool has been drained. So if you want an object value pointed to by an instance variable not to vanish in a puff of smoke, leaving you with a dangling pointer, you’d better retain it as you assign it to the instance variable.
- Instance variables are managed from different places in your code. This means that memory management can be spread out over several different methods, making it difficult to get right and difficult to debug if you get it wrong. For example, if you retained a value assigned to an instance variable, you’ll later need to release it, conforming with the golden rules of memory management, to prevent a leak — but in some other method.
- Instance variables might not belong to you. You will often assign to or get a value from an instance variable belonging to another object. You are now sharing access to a value with some other persistent object. If that other object were to go out of existence and release its instance variables, and you have a pointer to the instance variable value coming from that other object and you haven’t asserted your own ownership by retaining that value, you can wind up with a dangling pointer.
To see what I mean, return once more to Example 10.2. As I have already explained, there was no need to worry about memory management during this code, even without ARC. We have a mutable dictionary d, which we acquired as a ready-made instance by calling [NSMutableDictionary dictionary], and it isn’t going to vanish while we’re working with it. Now, however, suppose that in the next line we propose to assign d to an instance variable of ours:
self->_theData = d; // in non-ARC code this would be a bad idea!
Before ARC, that code constituted a serious potential mistake. If our code now comes to a stop, we’re left with a persistent pointer to an object over which we have never asserted ownership; it might vanish, leaving us with a dangling pointer. The solution, obviously, is to retain this object as we assign it to our instance variable. You could do it like this:
[d retain];
self->_theData = d;
Or you could do it like this:
self->_theData = d;
[self->_theData retain];
Or, because retain returns the object to which it sent, you could actually do it like this:
self->_theData = [d retain];
So which should you use? Probably none of them. Consider what a lot of trouble it will be if you ever want to assign a different value to self->_theData. You’re going to have to remember to release the object already pointed to (to balance the retain you’ve used here), and you’re going to have to remember to retain the next value as well. It would be much better to encapsulate memory management for this instance variable in an accessor (a setter). That way, as long as you always pass through the accessor, memory will be managed correctly. A standard template for such an accessor might look like Example 12.4.
Example 12.4. A simple retaining setter
- (void) setTheData: (NSMutableArray*) value {
    if (self->_theData != value) {
        [self->_theData release];
        self->_theData = [value retain];
    }
}
In Example 12.4, we release the object currently pointed to by our instance variable (and if that object is nil, no harm done) and retain the incoming value before assigning it to our instance variable (and if that value is nil, no harm done either). The test for whether the incoming value is the very same object already pointed to by our instance variable is not just to save a step; it’s because if we were to release that object, it could vanish then and there, instantly turning value into a dangling pointer — which we would then, horribly, assign to self->_theData.
The setter accessor now manages memory correctly for us; provided we always use it to set our instance variable, all will be well. This is one of the main reasons why accessors are so important! So the assignment to the instance variable in our original code should now look like this:
[self setTheData: d];
Observe that we can also use this setter subsequently to release the value of the instance variable and nilify the instance variable itself, thus preventing a dangling pointer, all in a single easy step:
[self setTheData: nil];
So there’s yet another benefit of using an accessor to manage memory.
Our memory management for this instance variable is still incomplete, however. We (meaning the object whose instance variable this is) must also remember to release the object pointed to by this instance variable at the last minute before we ourselves go out of existence. Otherwise, if this instance variable points to a retained object, there will be a memory leak. The “last minute” is typically dealloc, the NSObject method (Chapter 10) that is called as an object goes out of existence.
In dealloc, there is no need to use accessors to refer to an instance variable, and in fact it’s not a good idea to do so, because you never know what other side effects an accessor might have. And (under non-ARC code) you must always call super last of all. So here’s our implementation of this object’s dealloc:
- (void) dealloc {
    [self->_theData release];
    [super dealloc];
}
That completes the memory management for one instance variable. In general, if you are not using ARC, you will need to make sure that every object of yours has a dealloc that releases every instance variable whose value has been retained. This, obviously, is one more very good opportunity for you to make a mistake.
Warning
Never, never call dealloc in your code, except to call super last of all in your override of dealloc.
Under ARC, you can’t call dealloc — yet another example of how ARC saves you from yourself.
Just as it’s not a good idea to use your own accessors to refer to your own instance variable in dealloc, so you should not use your own accessors to refer to your own instance variables in an initializer (see Chapter 5). The reason is in part that the object is not yet fully formed, and in part that an accessor can have other side effects. Instead, you will set your instance variables directly, but you must also remember to manage memory.
To illustrate, I’ll rewrite the example initializer from Chapter 5 (Example 5.3). This time I’ll allow our object (a Dog) to be initialized with a name. The reason I didn’t discuss this possibility in Chapter 5 is that a string is an object whose memory must be managed! So, imagine now that we have an instance variable _name whose value is an NSString, and we want an initializer that allows the caller to pass in a value for this instance variable. It might look like Example 12.5.
Example 12.5. A simple initializer that retains an ivar
- (id) initWithName: (NSString*) s {
    self = [super init];
    if (self) {
        self->_name = [s retain];
    }
    return self;
}
Actually, it is more likely in the case of an NSString that you would copy it rather than merely retain it. The reason is that NSString has a mutable subclass NSMutableString, so some other object might call initWithName: and hand you a mutable string to which it still holds a reference — and then mutate it, thus changing this Dog’s name behind your back. So the initializer would look like Example 12.6.
Example 12.6. A simple initializer that copies an ivar
- (id) initWithName: (NSString*) s {
    self = [super init];
    if (self) {
        self->_name = [s copy];
    }
    return self;
}
In Example 12.6, we don’t bother to release the existing value of _name; it is certainly not pointing to any previous value (because there is no previous value), so there’s no point.
Thus, memory management for an instance variable may take place in as many as three places: the initializer, the setter, and dealloc. This is a common architecture. It is a lot of work, and a common source of error, having to look in multiple places to check that you are managing memory consistently and correctly, but that’s what you must do if you aren’t using ARC (though, as I’ll point out later in this chapter, Objective-C has the ability to write your accessors for you).
Warning
Earlier, I mentioned that KVC will set an instance variable directly if it can’t find a setter corresponding to the key. When it does this, it retains the incoming value. This fact is little-known and poorly documented — and scary. The last thing you want, in non-ARC code, is implicit memory management. This is one more reason to provide accessors. On the other hand, if you’re using ARC, this is not such a worry, since ARC is already providing implicit memory management.
If you’re using ARC, ARC will manage your instance variable memory for you; you needn’t (and, by and large, you can’t) do it for yourself. By default, ARC will treat an instance variable the same way it treats any variable: on assignment to that instance variable, it creates a temporary variable, retains the assigned value in it, releases the current value of the instance variable, and performs the assignment. Thus, you write this code:
self->_theData = d; // an NSMutableDictionary
ARC, in effect, in accordance with its rule that it retains on assignment and releases the old value, substitutes something like this scenario:
// imaginary scenario: retain on assignment, release the previous value
id temp = self->_theData;
self->_theData = d;
[self->_theData retain];
[temp release];
This is exactly the right thing to have happened; in fact, it will not have escaped your attention that it is virtually the same code you would have written for a formal accessor such as Example 12.4. So much for worrying about release and retain on assignment! If you did want to write a setter, it might consist of no more than a direct assignment:
- (void) setTheData: (NSMutableArray*) value {
    self->_theData = value;
}
Moreover, when your object goes out of existence, ARC releases its retained instance variable values. So much for worrying about releasing in dealloc! You may still need, under ARC, to implement dealloc for other reasons — for example, it could still be the right place to unregister for a notification (Chapter 11) — but you won’t call release on any instance variables there, and you won’t call super. At the time dealloc is called, your instance variables have not yet been released, so it’s fine to refer to them in dealloc.
At this point you may be imagining that, under ARC, you might be able to live without any accessors at all: instead, you can just assign directly to your instance variables and all the right memory-management things will happen, so who needs a formal setter? However, a formal accessor, as I’ll explain later, can do things above and beyond ARC’s automated insertion of release-and-retain, such as copying instead of retaining, dealing with multithreading, and adding your own custom behaviors. Also, obviously, accessors can be made public and so available to other objects, whereas an instance variable is not public.
Note
In the absence of a release call, which is forbidden under ARC, what happens if you want to release an instance variable’s value manually? The solution is simple: set the instance variable to nil. When you nilify a variable, ARC releases its existing value for you by default.
You may be wondering
about ARC’s implications for the way you’ll write an initializer that involves setting object instance variable values, as in Example 12.5 and Example 12.6. The code for these initializers will be just the same under ARC as under non-ARC, except that you needn’t (and can’t) say retain. So Example 12.5 under ARC would look like Example 12.7.
Example 12.7. A simple initializer that retains an ivar under ARC
- (id) initWithName: (NSString*) s {
    self = [super init];
    if (self) {
        self->_name = s;
    }
    return self;
}
Example 12.6 under ARC will be unchanged, as shown in Example 12.8; you can still say copy under ARC, and ARC understands how to manage the memory of an object returned from a method whose camelCased name starts with (or simply is) copy.
Example 12.8. A simple initializer that copies an ivar under ARC
- (id) initWithName: (NSString*) s {
    self = [super init];
    if (self) {
        self->_name = [s copy];
    }
    return self;
}
ARC’s behavior is automatic and mindless; it knows nothing of the logic of the relationships between objects in your app. Sometimes, you have to provide ARC with further instructions to prevent it from doing something detrimental. Typically, this detrimental thing will be the creation of a retain cycle.
A retain cycle is a situation in which object A and object B are each retaining one another. This can arise quite innocently, because relationships in an object graph can run both ways. For example, in a system of orders and items, an order needs to know what its items are and an item might need to know what orders it is a part of, so you might be tempted to let it be the case both that an order retains its items and that an item retains its orders. That’s a retain cycle, with object A (an order) retaining object B (an item) and vice versa. Such a situation, if allowed to persist, will result in a leak of both objects, as neither object’s retain count can decrement to zero. Another way of looking it is to say that object A, by retaining object B, is also retaining itself, and thus preventing its own destruction.
To illustrate the problem, I’ll suppose a simple class MyClass with a single ivar _thing and a single public setter setThing:, with logging in dealloc, like this:
@implementation MyClass {
    id _thing;
}

- (void) setThing: (id) what {
    self->_thing = what;
}

-(void)dealloc {
    NSLog(@"%@", @"dealloc");
}
@end
We now run this code:
MyClass* m1 = [MyClass new];
MyClass* m2 = [MyClass new];
m1.thing = m2;
m2.thing = m1;
Under ARC, unless you take steps to the contrary, this will be a retain cycle; by default, m1 and m2 are now retaining one another, because by default, ARC retains on assignment. When the code runs, dealloc is never called for either of our MyClass instances. They have leaked.
You can prevent an instance variable from retaining the object assigned to it by specifying that the instance variable should be a weak reference. You can do this with the __weak qualifier in the instance variable’s declaration:
@implementation MyClass {
    __weak id _thing;
}
Now there is no retain cycle. In our example, since both m1 and m2 exist only as automatic variables in the scope of the code that creates them, they will both go out of existence instantly when that code comes to an end and ARC releases them both (to balance the new calls that created them).
Note
In ARC, a reference not explicitly declared weak is a strong reference. Thus, a strong reference is one where ARC retains as it assigns. There is in fact a __strong qualifier, but in practice you’ll never use it, as it is the default. (There are also two additional qualifiers, __unsafe_unretained and __autoreleasing, but they are rarely needed and I don’t talk about them in this book.)
In real life, a weak reference is most commonly used to connect an object to its delegate (Chapter 11). A delegate is an independent entity; there is usually no reason why an object needs to claim ownership of its delegate. The object should have no role in the persistence of its delegate; and it could even be that the delegate might for some reason retain the object, causing a retain cycle. Therefore, most delegates should be declared as weak references. For example, in an ARC project created from Xcode’s Utility Application project template, you’ll find this line:
@property (weak, nonatomic) id <FlipsideViewControllerDelegate> delegate;
(The delegate may also be tagged as an IBOutlet.) The keyword weak in the property declaration, as I’ll explain more fully later in this chapter, is equivalent to declaring the _delegate instance variable as __weak.
In non-ARC code, a reference can be prevented from causing a retain cycle merely by not retaining when assigning to that reference; the reference isn’t memory-managed at all. You will see this referred to as a weak reference; it is not, however, quite the same thing as an ARC weak reference. A non-ARC weak reference risks turning into a dangling pointer when the instance to which it points is released. Thus it is possible for the reference to be non-nil and pointing to garbage, so that a message sent to it can have mysteriously disastrous consequences. Amazingly, however, this cannot happen with an ARC weak reference: the instance to which it points can be released and have its retain count reach zero and vanish, but when it does, any ARC weak reference that was pointing to it is set to nil! This amazing feat is accomplished by some behind-the-scenes bookkeeping: when an object is assigned to a weak reference, ARC in effect notes this fact on a scratchpad list. When the object is released, ARC consults the scratchpad list and discovers the existence of the weak reference to it, and assigns nil to that weak reference. This is yet another reason for preferring to use ARC wherever possible! ARC sometimes refers to non-ARC weak references, disdainfully but accurately, as “unsafe.” (Non-ARC weak references are in fact the __unsafe_unretained references I mentioned a moment ago.)
Unfortunately, large parts of Cocoa don’t use ARC. Most properties of built-in Cocoa classes that keep weak references are non-ARC weak references (because they are old and backwards-compatible, whereas ARC is new). Such properties are declared using the keyword assign. For example, UINavigationController’s delegate property is declared like this:
@property(nonatomic, assign) id<UINavigationControllerDelegate> delegate
This means that if you assign some object to a UINavigationController as its delegate, and if that object is about to go out of existence at a time when this UINavigationController still exists, you have a duty (regardless of whether you’re using ARC) to set that UINavigationController’s delegate property to some other object, or to nil; otherwise, it might try to send a message to its delegate at some future time, when the object no longer exists and its delegate property is a dangling pointer, and the app will then crash — and, since this happens at some future time, figuring out the cause of the crash can be quite difficult. (This is the sort of situation in which you might need to turn on zombies in order to debug, as described earlier in this chapter.)
Note
New in iOS 6 are collections whose memory management policy is up to you. NSPointerArray, NSHashTable, and NSMapTable are similar respectively to NSMutableArray, NSMutableSet, and NSMutableDictionary. But an NSHashTable, say, created with the class method weakObjectsHashTable maintains weak references to its elements. Under ARC, these are weak references in the ARC sense: they are replaced by nil if the retain count of the object to which they were pointing has dropped to zero. You may find uses for these classes as a way of avoiding retain cycles.
NSNotificationCenter presents some curious memory management features. As you are likely to want to use notifications (Chapter 11), you’ll need to know about these.
If you registered with the notification center using addObserver:selector:name:object:, you handed the notification center a reference to yourself as the first argument; the notification center’s reference to you is a non-ARC weak reference, and there is a danger that after you go out of existence the notification center will try to send a notification to whatever is referred to, which, if it isn’t you (because you no longer exist), will be garbage. That is why you must unregister yourself before you go out of existence. By unregistering yourself, you remove the notification center’s reference to you, so there’s no chance it will ever again try to send you a notification.
This is similar to the situation with delegates that I was talking about a moment ago.
If you registered with the notification center using addObserverForName:object:queue:usingBlock:, memory management can be quite tricky, under ARC in particular. Here are the key facts to know:
-
The observer token returned from the call to
addObserverForName:object:queue:usingBlock:is retained by the notification center until you unregister it. -
The observer token may also be retaining you through the block. If so, then until you unregister the observer token from the notification center, the notification center is retaining you. This means that you will leak until you unregister. But you cannot unregister from the notification center in
dealloc, becausedeallocisn’t going to be called so long as you are registered. - In addition, if you also retain the observer token, then if the observer token is retaining you, you have a retain cycle on your hands.
Consider, for example, this code, in which we register for a fictitious notification:
self->_observer = [[NSNotificationCenter defaultCenter]
    addObserverForName:@"heyho"
    object:nil queue:nil usingBlock:^(NSNotification *n) {
        NSLog(@"%@", self);
    }];
Our intention is eventually to unregister the observer; that’s why we’re keeping a reference to it:
[[NSNotificationCenter defaultCenter] removeObserver:self->_observer];
But there are two problems:
-
The notification center is retaining us (
self) -
The rule is that if
selfis mentioned in a block, then if the block is copied,selfis retained. This is a situation where the block is copied. Thus the block retainsself, the observer token retains the copied block, and the notification center retains the observer. Therefore we won’t be sentdeallocso long as the observer token remains registered. - There’s a potential retain cycle
-
Because
selfis mentioned in the block, the observer token is retaining us. But we are also retaining the observer token, through the assignment to an instance variable.
Note
How do we know that the block is copied and that self is retained?
The NSNotificationCenter class documentation on addObserverForName:object:queue:usingBlock: says so: “The block is copied by the notification center and (the copy) held until the observer registration is removed.” Under ARC, a copied block retains self if self is referred to, even indirectly (that is, even if what is referred to is an instance variable).
In effect, we have retained ourselves twice, once by virtue of being registered with the notification center, and again by virtue of retaining the observer token. I will present three solutions to this problem, in what I take to be the order of increasing goodness:
- Unregister the observer and release the observer
-
Since
deallocwon’t be called until after we unregister, you’ll have to set up some earlier code that will be called. If this is a view controller, for example,viewDidDisappear:can be a good place. Unregister the observer, thus causing the notification center to release the observer token. Then set_observerto nil, thus causing ourselves to release the observer token. Now no one is retaining the observer token. The observer token goes out of existence, releasingselfas it does so, and we won’t leak. - Unregister the observer and don’t retain the observer in the first place
-
Make
_observera weak reference. Now the assignment toself->_observerdoesn’t retain the observer token.deallocstill won’t be called until after we unregister, so we still have to find earlier code that will be called. Unregister the observer, thus causing the notification center to release the observer token; no one else is retaining it, so it goes out of existence, releasingselfas it does so, and we won’t leak. -
Don’t let the block retain
selfin the first place -
If the block doesn’t retain
self, none of these problems arises.deallocwill be called even if the observer is still registered. Indealloc, unregister the observer.
How can you prevent the block from retaining self? You use a technique demonstrated in Apple’s WWDC 2011 videos, commonly called “the weak–strong dance” (Example 12.9).
The weak–strong dance works like this:
|
We form a local weak reference to self, outside the block but where the block can see it. It is this weak reference that will pass into the block. |
|
|
Inside the block, we form from that weak reference a normal strong reference. This step may seem unnecessary, but in a multithreaded situation, there is a chance that a weak reference, even a weak reference to |
|
|
We use that normal strong reference in place of any references to |
The weak–strong dance may seem elaborate, but it’s worth learning to do. It is, as I said, the only one of the three proposed solutions that allows dealloc to be called before you unregister the observer. Thus, it is the only solution that allows you to unregister the observer in your dealloc implementation, which is typically just where you’d prefer to do it.
Note
If you expect the notification to be posted and the block to be called only once, there’s another solution: unregister in the block. I’ll show how to do that in Chapter 38.
Another unusual case is NSTimer (Chapter 10). The NSTimer class documentation says that “run loops retain their timers”; it then says of scheduledTimerWithTimeInterval:target:selector:userInfo:repeats: that “The target object is retained by the timer and released when the timer is invalidated.” This means that as long as a repeating timer has not been invalidated, the target is being retained by the run loop; the only way to stop this is to send the invalidate message to the timer. (With a non-repeating timer, the problem doesn’t arise, because the timer invalidates itself immediately after firing.)
When you called scheduledTimerWithTimeInterval:target:selector:userInfo:repeats:, you probably supplied self as the target: argument. This means that you (self) are being retained, and cannot go out of existence until you invalidate the timer. You can’t do this in your dealloc implementation, because as long as the timer is repeating and has not been sent the invalidate message, dealloc won’t be called. You therefore need to find another appropriate moment for sending invalidate to the timer. There’s no good way out of this situation; you simply have to find such a moment, and that’s that.
A block-based alternative to a timer is available through GCD. The timer “object” is a dispatch_source_t, and must be retained, typically as an instance variable (which ARC will manage for you, even though it’s a pseudo-object).
The timer will fire repeatedly after you initially “resume” it, and will stop firing when it is released, typically by nilifying the instance variable. But you must still take precautions to prevent the timer’s block from retaining self and causing a retain cycle, just as with notification observers. Here’s some typical skeleton code:
@implementation OtherViewController {
    dispatch_source_t _timer; // ARC will manage this pseudo-object
}

- (IBAction)doStart:(id)sender {
    self->_timer = dispatch_source_create(
        DISPATCH_SOURCE_TYPE_TIMER,0,0,dispatch_get_main_queue());
    dispatch_source_set_timer(
        self->_timer, dispatch_walltime(NULL, 0),
        1 * NSEC_PER_SEC, 0.1 * NSEC_PER_SEC);
    dispatch_source_set_event_handler(self->_timer, ^{
        NSLog(@"%@", self); // retain cycle
    });
    dispatch_resume(self->_timer);
}

- (IBAction)doStop:(id)sender {
    self->_timer = nil;
}

-(void)viewWillDisappear:(BOOL)animated {
    [super viewWillDisappear:animated];
    self->_timer = nil; // break retain cycle
}
@end
In general, you must be on the lookout for Cocoa objects with unusual memory management behavior. Such behavior will usually be called out clearly in the documentation. For example, the UIWebView documentation warns: “Before releasing an instance of UIWebView for which you have set a delegate, you must first set its delegate property to nil.” And a CAAnimation object retains its delegate; this is exceptional and can cause trouble if you’re not conscious of it.
There are also situations where the documentation fails to warn of any special memory management considerations, but ARC itself will warn of a possible retain cycle due to the use of self in a block. Again, the weak–strong dance is likely to be your best defense. An example is the completion handler of UIPageViewController’s instance method setViewControllers:direction:animated:completion:, where the compiler will warn, “Capturing ‘self’ strongly in this block is likely to lead to a retain cycle.” Using the weak–strong dance, you capture self weakly instead.
On iOS, when a nib loads, the top-level nib objects that it instantiates are autoreleased. So if someone doesn’t retain them, they’ll quickly vanish in a puff of smoke. There are two primary strategies for preventing that from happening:
- Outlet graph with retain
-
A memory management graph is formed: every top-level object is retained by another top-level object (without retain cycles, of course), with the File’s Owner as the start of the graph. So, the File’s Owner proxy has an outlet to a top-level object; when the nib loads and the top-level object is assigned to the corresponding instance variable of the actual nib owner instance (Chapter 7), it is retained. If you arrange the chain of retains correctly, all objects that need to be retained will be (Figure 12.1). This is the strategy you’ll typically use when loading a nib.
You can see this strategy being used, for example, in a project made from the Single View Application template. The ViewController class is a UIViewController subclass; UIViewController has a
viewproperty which retains the value assigned to it. Inside the nib, an outlet calledviewruns from the File’s Owner, which is a ViewController, to the top-level UIView (called View) in the nib. Thus this view is assigned to the ViewController’sviewproperty when the nib loads; therefore it is retained and doesn’t vanish in a puff of smoke. - Mass retain
-
The call to NSBundle’s
loadNibNamed:owner:options:(Chapter 7) returns an NSArray of the top-level objects instantiated from the nib; retain this NSArray. This is the strategy used byUIApplicationMainwhen it loads the app’s main nib, if there is one. Similarly, UINib’sinstantiateWithOwner:options:returns an array of the top-level objects instantiated from the nib. In Chapter 21 I’ll show an example.
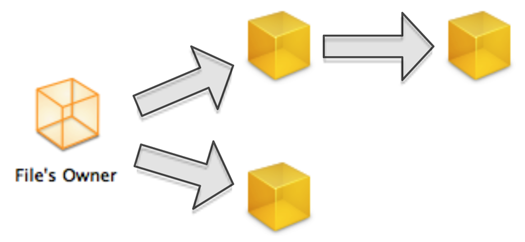
Objects in the nib that are not top-level objects are already part of a memory management object graph, so there’s no need for you to retain them directly. For example, if you have a top-level UIView in the nib, and it contains a UIButton, the UIButton is the UIView’s subview — and a view retains its subviews and takes ownership of them. Thus, it is sufficient to manage the UIView’s memory and to let the UIView manage the UIButton. If you have an outlet to this button, you typically don’t have to retain the button, because it is retained by the UIView as long as the UIButton is inside it (though you would want to retain the button in the rare case where you are planning at some point in your code to remove the button from its superview while keeping it on hand for later use).
Mac OS X Programmer Alert
Memory management for nib-loaded instances is different on iOS than on Mac OS X. On Mac OS X, nib-loaded instances are not autoreleased, so they don’t have to be retained, and memory management is usually automatic in any case because the file’s owner is usually an NSWindowController, which takes care of these things for you. On iOS, memory management of top-level nib objects is up to you. On Mac OS X, an outlet to a non-top-level object does not cause an extra retain if there is no accessor for the corresponding ivar; on iOS, it does.
In C, and therefore in Objective-C, it is permitted to declare a variable outside of any method. K&R (Chapter 1) calls this an external variable (see K&R 4.3); I call it a global variable. It is common practice, though not strictly required, to qualify such a variable’s declaration as static; such qualification is a technical matter of scope and has no effect on the variable’s persistence or its global nature.
Global variables are a C variable type, defined at file level; they know nothing of instances. Insofar as they have any relation to object-based programming, they may be defined in a class file so they are effectively class-level variables.
In Objective-C code, a global variable is not uncommonly used as a constant. You can sometimes initialize it as you declare it:
NSString* g_myString = @"my string";
If the value you want to assign to a global isn’t itself a constant, you’ll have to assign the value in actual code; the question is then where to put that code. Since a global variable is effectively a class-level variable, it makes sense to initialize it early in the lifetime of the class, namely in initialize (see Chapter 11).
The upshot is that a global variable is a class-level value and thus persists for the lifetime of the program. It has no memory management connected with instances, because it itself is not connected with instances. Thus in some sense it leaks, but deliberately so, in the same innocuous sense that a class object leaks.
On the other hand, you might have to use a tiny bit of explicit memory management in order to initialize a global variable in the first place. For example, suppose you’re not using ARC and you initialize a global variable in initialize to an autoreleased value. Clearly you’ll have to retain it, or it will just vanish out from under you. But you’ll never bother to release it; there’s no need, and no place where it would make sense to do so.
A number of Cocoa methods take an optional parameter typed as void*, and often called context:. You might think that void*, the universal pointer type, would be the same as id, the universal object type, because a reference to an object is a pointer. But an id is a universal object type; void* is just a C pointer. This means that Cocoa won’t treat this value as an object. So the use of the void* type is a clue to you that Cocoa won’t do any memory management on this value. Thus, making sure that it persists long enough to be useful is up to you.
The big change wrought by ARC in this regard has to do, not with memory management, but with “crossing the bridge” between an id and a void*. Before ARC, these two types were treated as equivalent, in the sense that you could supply one where the other was expected. But ARC is not so sanguine. ARC manages memory for objects only. Thus, it manages memory for something typed as id, but not for something typed as void*. Therefore, if you want to use an object where a void* is expected, or a void* where an object is expected, you must reassure ARC that you know what you’re doing.
When an object comes into existence by instantiation under ARC, it is memory-managed by ARC from birth to death, as it were. But when an object is cast to a void*, it passes out of the realm of ARC memory management, and ARC will not let go without more information, because it doesn’t understand what its memory management responsibilities should be at this moment. Similarly, when a non-object (a void*) is cast to an object type, it passes ready-made into the realm of ARC memory management, and ARC will not accept it without more information.
When you pass value in as a context: argument, your purpose is to get it back out again later; it’s an identifier, or a carrier of extra information or data. For example, when you pass a context: value as you send addObserver:forKeyPath:options:context: to some object (see on key–value observing in Chapter 13), this is so that you can obtain that same value when Cocoa later sends observeValueForKeyPath:ofObject:change:context: back to you. Cocoa isn’t going to retain the value for you, but on the other hand the value needs to exist only as long as you are likely to be called back in this way.
Thus it will make the most sense if you simply keep a reference to that value and manage its memory through that reference. The context: value itself is just a pointer. As a result, as the context: argument passes out of ARC’s purview, and later as it passes back in again, ARC has no memory management responsibilities: you just want ARC to permit the cast. The way to indicate this is to cast the value explicitly, with a __bridge qualifier.
For example, let’s say that you write this:
[someObject addObserver:self forKeyPath:@"yoho"
    options:0 context:myContext];
Before ARC, that code was legal. Under ARC, it isn’t; the compiler will stop you in your tracks with this complaint: “Implicit conversion of Objective-C pointer type ‘id’ to C pointer type ‘void *’ requires a bridged cast.” So you supply the bridged cast:
[someObject addObserver:self forKeyPath:@"yoho"
    options:0 context:(__bridge void*) myContext];
Later, when the context comes back to you in a callback, you’ll cast it back to a __bridge id so that ARC will accept it and you can continue treating it as an object.
This leaves only the question of how to manage the memory of the object that’s being handed back and forth as the context: argument. All this is happening in different methods, and the object must persist through all of them. Clearly the most sensible solution is to maintain the object through an instance variable. Under ARC, in particular, this is a lightweight approach; the object will be memory-managed with no particular effort on your part. It may persist even after it is no longer needed, but it won’t actually leak. The situation is only slightly more complicated if you’ve more than one context object to manage simultaneously; for example, you could store them all in a collection, such as an NSMutableSet instance variable.
Considerations of this sort do not apply to parameters that are typed as objects. For instance, when you call postNotificationName:object:userInfo:, the userInfo is typed as an NSDictionary and is retained for you by the notification center (and released after the notification is posted); its memory management behind the scenes is not your concern.
A CFTypeRef (see Chapter 3) is a value obtained through a C function that is a pointer to a struct; its type name will usually end in “Ref”. It is a kind of object, even though it isn’t a full-fledged Cocoa Objective-C object, and it must be managed in much the same way as a Cocoa object. ARC is irrelevant to this fact. ARC manages Objective-C objects; it has no concern with CFTypeRefs. You must manage the memory of CFTypeRefs manually, even if you’re using ARC. Indeed, as I shall explain, the fact that you are using ARC actually increases the degree of your memory management responsibility.
I will divide the discussion into two halves: memory management of CFTypeRefs on their own, and what happens when you “cross the bridge” between a CFTypeRef and a full-fledged Objective-C object type.
Just as, in the Objective-C world of objects, certain method names (alloc, copy, and retain) alert you to your memory management responsibilities, so too in the world of CFTypeRefs. The golden rule here is that if you obtained such an object through a function whose name contains the word Create or Copy, you are responsible for releasing it. In the case of a Core Foundation object (its type name begins with CF), you’ll release it with the CFRelease function; other object creation functions are paired with their own object release functions.
Warning
An Objective-C object can be sent messages even if it is nil. But CFRelease cannot take a nil argument. Be sure that a CFTypeRef variable is not nil before releasing it.
The matter is not a complicated one; it’s much simpler than memory management of Cocoa objects, and the documentation will usually give you a hint about your memory management responsibilities. As an example, here (without further explanation) is some actual code from one of my apps, strongly modeled on Apple’s own example code, in which I set up a base pattern color space (for drawing with a pattern):
- (void) addPattern: (CGContextRef) context color: (CGColorRef) incolor {
    CGColorSpaceRef baseSpace = CGColorSpaceCreateDeviceRGB();
    CGColorSpaceRef patternSpace = CGColorSpaceCreatePattern(baseSpace);
    CGContextSetFillColorSpace(context, patternSpace);
    CGColorSpaceRelease(patternSpace);
    CGColorSpaceRelease(baseSpace);
    // ...
}
Never mind exactly what that code does; the important thing here is that the values for baseSpace and patternSpace are a CFTypeRef (in particular, a CGColorSpaceRef) obtained through functions with Create in their name, so after we’re done using them, we release them with the corresponding release function (here, CGColorSpaceRelease).
Similarly, you can retain a Core Foundation object, if you are afraid that it might go out of existence while you still need it, with the CFRetain function, and you are then, once again, responsible for releasing it with the CFRelease function.
We now come to the business of “crossing the bridge.” As I explained in Chapter 3, many Core Foundation object types are toll-free bridged with a corresponding Cocoa object type. Now, from a theoretical point of view, memory management is memory management: it makes no difference whether you use Core Foundation memory management or Cocoa memory management. Thus, if you obtain a CFStringRef through a Create or Copy function and assign it to an NSString variable, sending release to it through the NSString variable is just as good as calling CFRelease on it as a CFStringRef. And before ARC, that was the end of the matter.
Under ARC, however, we face the same problem I described in the preceding section. ARC manages memory for Objective-C objects; it knows nothing of CFTypeRefs. Therefore, ARC is not going to let you hand an object into or out of its memory-management purview without explicit information about how to manage its memory. This means a little extra thought for you, but it’s a good thing, because it means you can tell ARC to do automatically what you would have done manually.
For example, a moment ago I said that, before ARC, you might obtain a CFStringRef through a Create or Copy function, cast it to an NSString, and later send release to it through the NSString. Under ARC, you can’t say release, but you can arrange for ARC to do exactly the same thing: as you “cross the bridge”, you pass the CFString through the CFBridgingRelease function. The result is an id that can be assigned to an NSString variable, and that ARC will release to balance out the incremented retain count generated by the original Create or Copy function.
You have three choices as you cross the toll-free bridge:
-
__bridgecast -
As illustrated in the previous section, you cast explicitly to the across-the-bridge type and qualify the cast with
__bridge. This means that memory management responsibilities are independent on either side of the bridge. You’re telling ARC that you’re going to be performing complete and correct memory management on the CFTypeRef side of the bridge. -
CFBridgingReleasefunction -
You’re crossing the bridge from the CFTypeRef side to the object side. You’re telling ARC that memory management for this object is incomplete: it has a raised retain count on the CFTypeRef side (probably because you generated it with a
CreateorCopyfunction, or calledCFRetainon it), and it will be up to ARC to perform the corresponding release on the object side. (Alternatively, you can do a__bridge_transfercast.) Here’s an artificial but correct example:CFArrayRef arr_ref = CFLocaleCopyISOCountryCodes(); // note "copy" NSArray* arr = CFBridgingRelease(arr_ref); // memory management complete // ARC will manage this array correctly from here on
-
CFBridgingRetainfunction -
You’re crossing the bridge from the object side to the CFTypeRef side. You’re telling ARC that it should leave memory management for this object incomplete: you’re aware of the raised retain count on the object side, and you intend to call
CFReleaseon it yourself on the CFTypeRef side. (Alternatively, you can do a__bridge_retainedcast.)
You may see __bridge_transfer and __bridge_retained in code written by other people, but I strongly recommend that you stick to CFBridgingRelease and CFBridgingRetain in your own code, as they are eminently clearer (and better named). Note that it is perfectly possible to pass an object out of the object world with CFBridgingRetain and back into it later with CFBridgingRelease.
A property (see Chapter 5) is syntactic sugar for calling an accessor by using dot-notation. For instance, in an example earlier in this chapter we had an object with an NSMutableArray instance variable and a setter, which we called like this:
[self setTheData: d];
We could equally have said this:
self.theData = d;
The effect would be exactly the same, because setting a property is just a shorthand for calling the setter method. Similarly, suppose we were to say this:
NSMutableArray* arr = self.theData;
That is exactly the same as calling the getter method, [self theData].
In those examples, we are presuming the existence of the getter and setter methods. The declaration of an accessor method is what permits us to use the corresponding notation: the declaration of the setter lets us use property notation in an lvalue (to assign to the property), and the declaration of the getter lets us use property notation otherwise (to fetch the property’s value).
It is also possible to declare a property explicitly, instead of declaring the getter and setter methods. Declaring a property is thus a shorthand for declaring accessors, just as using a property is shorthand for calling an accessor. But declaring a property can do much more for you and your code than that. How much more it can do has increased historically, depending on what system and what version of Xcode you’re using; here’s a list of the powers of property declaration, roughly in order of increasing power, which is also roughly the order in which those powers were introduced historically:
- A property declaration saves you from having to declare accessor methods. It is simpler to declare one property than to declare two accessor methods.
- A property declaration includes a statement of the setter’s memory management policy. This lets you, the programmer, know easily, just by glancing at a property declaration, how the incoming value will be treated. You could find this out otherwise only by looking at the setter’s code — which, if this is a built-in Cocoa type, you cannot do (and even in the case of your own code, it’s a pain having to locate and consult the setter directly).
-
With a property declaration, you can optionally omit writing one or both accessors. The compiler will write them for you! To get the compiler to do this, you include a
@synthesizedirective in your class’s implementation section. Such an automatically constructed accessor is called, naturally enough, a synthesized accessor.Writing accessors is boring and error-prone. It can also be hard! In a multithreading situation, it is doubtful that you would even know how to write a thread-safe accessor; a synthesized accessor is thread-safe by default. Any time correct code is written for you automatically, it’s a major benefit. Moreover, your class is now key–value coding compliant for the accessor name, with no effort on your part.
Furthermore, your setter memory management policy, as specified in the property declaration, is followed by the synthesized setter. Your wish is Cocoa’s command!
-
With a synthesized accessor, you don’t have to declare the corresponding instance variable that the accessor gets or sets. It is implicitly declared for you! Automatic implicit declaration of instance variables was introduced as part of a major advance in Objective-C: the documentation refers to the earlier period (when you still had to declare instance variables yourself, even with a declared property and a synthesized accessor) as “the legacy runtimes”, and the later period (automatic implicit declaration of instance variables) as “the modern runtimes”.
As part of the
@synthesizedirective, you can specify the name of the instance variable that is to be implicitly declared for you. -
The ultimate convenience is the most recent (starting in LLVM compiler version 4.0, Xcode 4.4): you can omit the
@synthesizedirective! The compiler automatically inserts it for you, implicitly. This is called autosynthesis.The only downside to taking advantage of autosynthesis is that, because the
@synthesizedirective is omitted, you have no place to specify the name of the automatically declared instance variable. That isn’t much of a disadvantage; the name is supplied according to a simple rule, and the vast majority of the time you’ll be perfectly happy with it.
Thanks to autosynthesis, the mere presence of the property declaration — one line of code — is sufficient to trigger the entire stack of automatic behaviors: it equates to declaration of the accessors, and the accessors are written for you (in accordance with your declared memory management policy), and the instance variable is implicitly declared for you.
The possible memory management policies correspond simply to what has already been said in this chapter about the ARC reference types and how a setter might behave:
-
strong,retain -
Under ARC, the instance variable itself will be a normal (strong) reference, so when ARC assigns the incoming value to it, it will retain the incoming value and release the existing value of the instance variable. Under non-ARC, the setter method will retain the incoming value and release the existing value of the instance variable. The terms are pure synonyms of one another and can be used in ARC or non-ARC code;
retainis the term inherited, as it were, from pre-ARC days. -
copy -
The same as
strongorretain, except that the incoming value is copied (by sendingcopyto it) and the copy, which has an increased retain count already, is assigned to the instance variable. This is appropriate particularly when a nonmutable class has a mutable subclass (such as NSString and NSMutableString, or NSArray and NSMutableArray), to prevent the setter’s caller from passing in an object of the mutable subclass; it is legal for the setter’s caller to do so, because (in accordance with polymorphism, Chapter 5) where an instance of a class is expected, an instance of its subclass can be passed, but thecopycall creates an instance of the nonmutable class (Chapter 10). -
weak -
Under ARC, the instance variable will be a weak reference. ARC will assign the incoming value to it without retaining it. ARC will also magically nilify the instance variable if the instance to which it points goes out of existence. This is useful, as already explained earlier in this chapter, for breaking a potential retain cycle and for declining to retain inappropriately, and to reduce overhead where it is known that no memory management is needed, as with an interface object that is already retained by its superview. The setter method can be synthesized only under ARC; using
weakin non-ARC code is not strictly impossible but probably makes no sense. -
assign(the default) -
This policy is inherited from pre-ARC days; it is used in the same ways as
weak. The setter does not manage memory; the incoming value is assigned directly to the instance variable. The instance variable is not an ARC weak reference and will not be nilified automatically if the instance to which it points goes out of existence; it is a non-ARC weak reference (__unsafe_unretained) and can become a dangling pointer.
As I’ve already said, a property’s declared memory management policy is an instruction to the compiler if the setter is synthesized. If the setter is not synthesized, the declared memory management policy is “purely conventional” (as the LLVM documentation puts it), meaning that if you write your own setter, you’d better make that setter behave the way you declared you would, but nothing is going to force you to do so.
We come now to the formal syntax for declaring a property. A property is declared in the same part of a class’s interface section where you would declare methods. Its syntax schema is as follows:
@property (attribute, attribute, ...) type name;
Here’s a real example, for the NSMutableArray instance variable we were talking about a moment ago:
@property (nonatomic, strong) NSMutableArray* theData;
The type and name will usually match the type and name of an instance variable, but what you’re really indicating here are the name of the property (as used in dot-notation) and the default names of the setter (here, setTheData:) and getter (here, theData), and the type of value to be passed to the setter and obtained from the getter.
If this property will be represented by an outlet in a nib, you can say IBOutlet before the type. This is a hint to Xcode and has no formal meaning.
The type doesn’t have to be an object type; it can be a simple type such as BOOL, CGFloat, or CGSize. Of course in that case no memory management is performed (as none is needed), and no memory management policy should be declared; but the advantages of using a property remain — the accessors can be synthesized and the instance variable declared automatically.
The possible attribute values are:
- A memory management policy
-
I listed the names of these a few paragraphs ago. You will supply exactly one; under ARC this will usually be
strong. The default if you omit any memory management policy isassign, but such omission is dangerous and you’ll get a warning from the compiler. -
nonatomic -
If omitted, the synthesized accessors will use locking to ensure correct operation if your app is multithreaded. This will rarely be a concern, and locking slows down the operation of the accessors, so you’ll probably specify
nonatomicmost of the time. It’s a pity thatnonatomicisn’t the default, but such is life. -
readwriteorreadonly -
If omitted, the default is
readwrite. If you sayreadonly, any attempt to use the property as a setter will cause a compile error (a useful feature), and if the accessors are to be synthesized, no setter is synthesized. -
getter=gname,setter=sname: -
By default, the property name is used to derive the names of the getter and setter methods that will be called when the property is used. If the property is named
myProp, the default getter method name ismyPropand the default setter name issetMyProp:. You can use either or both of these attributes to change that. If you saygetter=getALife, you’re saying that the getter method corresponding to this property is calledgetALife(and if the accessors are synthesized, the getter will be given this name). Users of the property won’t be affected, but calling an accessor method explicitly under a nonexistent name is a compile error.
To make a property declaration private, put it in a class extension (Chapter 10). Most commonly, the class extension will be at the top of the implementation (.m) file, before the implementation section. As a result, this class can use the property or call the accessors but other classes cannot (Example 12.10).
Example 12.10. A private property
// MyClass.m:
@interface MyClass ()
@property (nonatomic, strong) NSMutableArray* theData; // private
@end

@implementation MyClass
// other code goes here
@end
Being able to declare private properties is so useful that I find myself routinely adding a class extension to the top of any new class files (if the Xcode project template hasn’t done it for me), to make it easy to add private properties later if I need to. Note that knowledge of private properties is not inherited by subclasses; an elegant solution is to move the class extension interface section off into an isolated .h file of its own and import that into the implementation files of both the superclass and the subclass.
Another reason to put a property declaration in a class extension is so as to redeclare the property. For example, we might want our property to be readonly as far as the rest of the world knows, but readwrite for code within our class. To implement this, declare the property readonly in the interface section in the header file, which the rest of the world sees, and then redeclare it, not as readonly (in which case it will be readwrite by default), in the class extension in the implementation file, which only this class sees. All other attributes must match between both declarations.
A property declaration can also appear in a protocol or category declaration. This makes sense because, with a property declaration, you’re really just declaring accessor methods, and these are places where method declarations can go.
To request explicitly that the accessors be synthesized for you, use the @synthesize directive.
It appears anywhere inside the class’s implementation section, any number of times, and takes a comma-separated list of property names. The behavior and names of the synthesized accessors will accord with the property declaration attributes I’ve just talked about. You can state that the synthesized accessors should access an instance variable whose name differs from the property name by using the syntax propertyName=ivarName in the property name list; otherwise, the instance variable will have the same name as the property.
As I mentioned earlier, you don’t have to declare the instance variable; it will be declared for you automatically as part of accessor synthesis.
Note
An instance variable declared automatically through accessor synthesis is strictly private, meaning that it is not inherited by subclasses. This fact will rarely prove troublesome, but if it does, simply declare the instance variable explicitly.
Thus, having declared a property theData, to request explicitly that accessors be synthesized, you’d say this in the implementation section:
@synthesize theData;
The result is that any accessors you don’t write (theData and setTheData:, unless you changed these names in the property declaration) will be written for you behind the scenes, and if you didn’t declare an instance variable theData, it will be declared for you.
The name of the automatically declared instance variable is likely to be important to you, because you’re probably going to need to access the instance variable directly, especially in an initializer (and in dealloc if you’re not using ARC), as well as in any accessors that you write yourself.
Starting in the Xcode 4.2 application templates, Apple began following a convention where a synthesized accessor would take advantage of the propertyName=ivarName syntax to give the instance variable a name different from that of the property in that the former was prefixed with an underscore. For example, the AppDelegate class’s implementation section contained this line:
@synthesize window = _window;
The evident value of following this naming convention is that we can refer in our code to the property explicitly as self.window, but if we were accidentally to refer to the instance variable directly as window, we’d get a compilation error, because there is no instance variable window (it’s called _window). The convention thus prevents accidental direct access to the instance variable without passing through the accessors, as well as just distinguishing clearly in code which names are instance variables — they’re the ones prefixed with an underscore. Moreover, this policy frees up the property name (here, window) to be used as a local variable in a method, without getting a warning from the compiler that we’re overshadowing the name of an instance variable.
Autosynthesis follows the same naming policy. If you omit the @synthesize directive, the automatically generated name of the automatically declared instance variable is the name of the property prefixed with an underscore. For example, a declared property called theData will result in an instance variable called _theData. If for some reason that isn’t what you want, then use the @synthesize directive explicitly. Remember, if you do so, that if you don’t specify the instance variable name explicitly, the default instance variable name will be the same as the property name, without any underscore.
Regardless of whether you explicitly include a @synthesize directive or you take advantage of autosynthesis, you are permitted to write one or both accessors yourself. Synthesis means that any accessors you don’t provide will be provided for you. If you use autosynthesis (no @synthesize directive) and you provide both accessors, you won’t get any automatically declared instance variable. This is a very sensible policy: you’ve surrendered your chance to dictate the instance variable’s name in the @synthesize directive, but you’re also taking complete manual control of your accessors, so you’re given complete manual control of your instance variable as well.
A useful trick is to take advantage of the @synthesize syntax propertyName=ivarName to override the synthesized accessor without losing any of its functionality. What I mean is this. Suppose you want the setter for _myIvar to do more than just set _myIvar.
One possibility is to write your own setter; however, writing a setter from scratch is tedious and error-prone, whereas a synthesized setter does the job correctly and writing it is no work at all. The solution is to declare a property myIvar along with a corresponding private property (Example 12.10) — let’s call it myIvarAlias — and synthesize the private property myIvarAlias to access the _myIvar instance variable. You must then write the accessors for myIvar by hand, but all they need to do, at a minimum, is use the myIvarAlias properties to set and get the value of _myIvar respectively. The key point is that you can also do other stuff in those accessors (Example 12.11); whoever gets or sets the property myIvar will be doing that other stuff.
Example 12.11. Overriding synthesized accessors
// In the header file:
@interface MyClass : NSObject
@property (nonatomic, strong) NSNumber* myIvar;
@end

// In the implementation file:
@interface MyClass ()
@property (nonatomic, strong) NSNumber* myIvarAlias;
@end

@implementation MyClass
@synthesize myIvarAlias=_myIvar;
- (void) setMyIvar: (NSNumber*) num {
    // do other stuff here
    self.myIvarAlias = num;
}
- (NSNumber*) myIvar {
    // do other stuff here
    return self.myIvarAlias;
}
@end
Instead of writing your own accessors or providing a @synthesize directive or using autosynthesis, you can accompany a property declaration with a @dynamic directive (in the implementation section).
This tells the compiler that even though it doesn’t see any implementation of any accessors for this property, and even though it isn’t going to provide the accessors for you, it should permit the property declaration anyway, on the grounds that at runtime, when a call to one of the accessors arrives, your code will somehow magically handle it in some way that the compiler can’t grasp. Basically, you’re suppressing the compiler’s warning system; it just gives up and stands aside, and leaves you to hang yourself at runtime.
This is a rare but not unheard-of thing to do. It arises chiefly in two contexts: when defining your own animatable view property (Chapter 17), and when using managed object properties in Core Data (Chapter 36). In both of those situations, you harness the power of Cocoa to perform the magic handling of the accessor calls; you don’t know precisely how Cocoa performs this magic, and you don’t care.
But what if you wanted to perform this magic yourself? To put it another way, what sort of magic might Cocoa be using in those two limited situations? The answer lies in the power of Objective-C’s dynamic messaging. This is an advanced topic, but it’s so cool that I’ll show you an example anyway.
I propose to write a class that declares properties name (an NSString) and number (an NSNumber) but that has no accessor methods for name or number and that doesn’t use accessor synthesis. Instead, in our interface section we declare these properties dynamic. Since we’re not getting any help from synthesis, we must also declare the instance variables ourselves:
// the interface section declares properties "name" and "number"
@implementation MyClass {
    NSString* _name;
    NSNumber* _number;
}
@dynamic name, number;
// ...insert magic here...
@end
I can think of a couple of ways to concoct the necessary magic; in this example, I’m going to take advantage of a little-known NSObject class method called resolveInstanceMethod:. Recall that sending a message to an object is not the same as calling that method in that object; there are some additional steps, if that method is not found in that object, to resolve the method. One of the first of these steps, the first time a given message arrives and is found to have no corresponding method in the object’s class, is that the runtime looks for an implementation of resolveInstanceMethod in that class. If it finds it, it calls it, handing it the selector for the message that is giving us difficulty. resolveInstanceMethod: then returns a BOOL; a YES answer means, “Don’t worry, I’ve got it covered; go ahead and call that method.”
How can resolveInstanceMethod: possibly say this? What could it do, if the method doesn’t exist, to make it possible to call that method? Well, it could create that method. Objective-C is so dynamic that there’s a way to do this. And remember, resolveInstanceMethod: is called just once per method, so once it has created a method and returned YES, the problem is solved forever after for that method.
To create a method in real time, we call the class_addMethod function. (This will require importing <objc/runtime.h>.) It takes four parameters:
- The class to which the method is to be added.
- The selector for the method that is being added (basically, this is the name of the method).
-
The IMP for the method. What’s an IMP? It’s the function that backs this method. Behind every Objective-C method lies a C function. This function takes the same parameters as the Objective-C method, with the addition of two extra parameters, which come at the start: the object that acts as
selfwithin this function, and the selector for the method that this function is backing. - A C string describing, in a special code, the type of the function’s returned value (which is also the type of the method’s returned value) and the argument types of the function. When I say “type” I mean little more than C type; every object type is considered the same.
In our example we have four methods to cover (the two accessors for the two dynamic properties) — name, setName:, number, and setNumber:. So in order to call class_addMethod in resolveInstanceMethod:, we will also have to have written C functions to act as the IMP for each of those methods. Now, we could just write four C functions — but that would be pointless! If we were going to do that, why are we going to all the trouble of using a dynamic accessor? Instead, I propose to write just two C functions, one to handle any getter that we may care to direct at it, and one to handle any setter that we may care to direct at it.
Let’s take the getter first, as it is much the simpler case. What must a generalized getter do? It must access the corresponding instance variable. And what’s the name of the corresponding instance variable? Well, the way we’ve set things up, it’s the name of the method with an underscore prefixed to it. So, we grab the name of the method (which we can do because it has arrived as the selector, the second parameter to this function), stick an underscore on the front, and return the value of the instance variable whose name we’ve just derived. To make life simple, I’ll obtain the value of that instance variable using key–value coding; the presence of the underscore means that this won’t result in any circularity (that is, our function won’t end up calling itself in an infinite recursion):
id callValueForKey(id self, SEL _cmd) {
    NSString* key = NSStringFromSelector(_cmd);
    key = [@"_" stringByAppendingString:key];
    return [self valueForKey:key];
}
Now that we’ve done that, we can see how to write the setter. It’s just a matter of doing a slightly more elaborate manipulation of the selector’s name in order to get the name of the instance variable. We must pull the set off the front and the colon off the end, and make sure the first letter is lowercase — and then we prefix the underscore, just as before:
void callSetValueForKey(id self, SEL _cmd, id value) {
    NSString* key = NSStringFromSelector(_cmd);
    key = [key substringWithRange:NSMakeRange(3, [key length]-4)];
    NSString* firstCharLower =
        [[key substringWithRange:NSMakeRange(0,1)] lowercaseString];
    key = [key stringByReplacingCharactersInRange:NSMakeRange(0,1)
                                       withString:firstCharLower];
    key = [@"_" stringByAppendingString:key];
    [self setValue:value forKey:key];
}
Finally, we’re ready to write resolveInstanceMethod:. In my implementation, I’ve used this method as a gatekeeper, explicitly checking that the method to be called is an accessor for one of our dynamic properties:
+ (BOOL) resolveInstanceMethod: (SEL) sel {
    // this method will be called
    if (sel == @selector(setName:) || sel == @selector(setNumber:)) {
        class_addMethod([self class], sel, (IMP) callSetValueForKey, "v@:@");
        return YES;
    }
    if (sel == @selector(name) || sel == @selector(number)) {
        class_addMethod([self class], sel, (IMP) callValueForKey, "@@:");
        return YES;
    }
    return [super resolveInstanceMethod:sel];
}
You’ll just have to trust me on the encoded C string in the fourth argument to class_addMethod; if you don’t, read the documentation to see what it means. My overall implementation here is simple-minded — in particular, my use of key–value coding is sort of an easy way out, and I’ve failed to grapple with the need for copy semantics in the NSString setter — but it’s quite general, and gives you a peek under the Objective-C hood.