Popovers and split views are forms of interface that exist only on the iPad.
A popover (managed by a UIPopoverController) is a sort of secondary window or dialog: it displays a view layered on top of the main interface. It is usually associated, through a sort of arrow, with a view in the main interface, such as the button that the user tapped to summon the popover. It does not dim out the rest of the screen, like a presented view whose presentation mode is UIModalPresentationPageSheet or UIModalPresentationFormSheet (see Chapter 19). It might be effectively modal, preventing the user from working in the rest of the interface; alternatively, it might vanish if the user taps outside it.
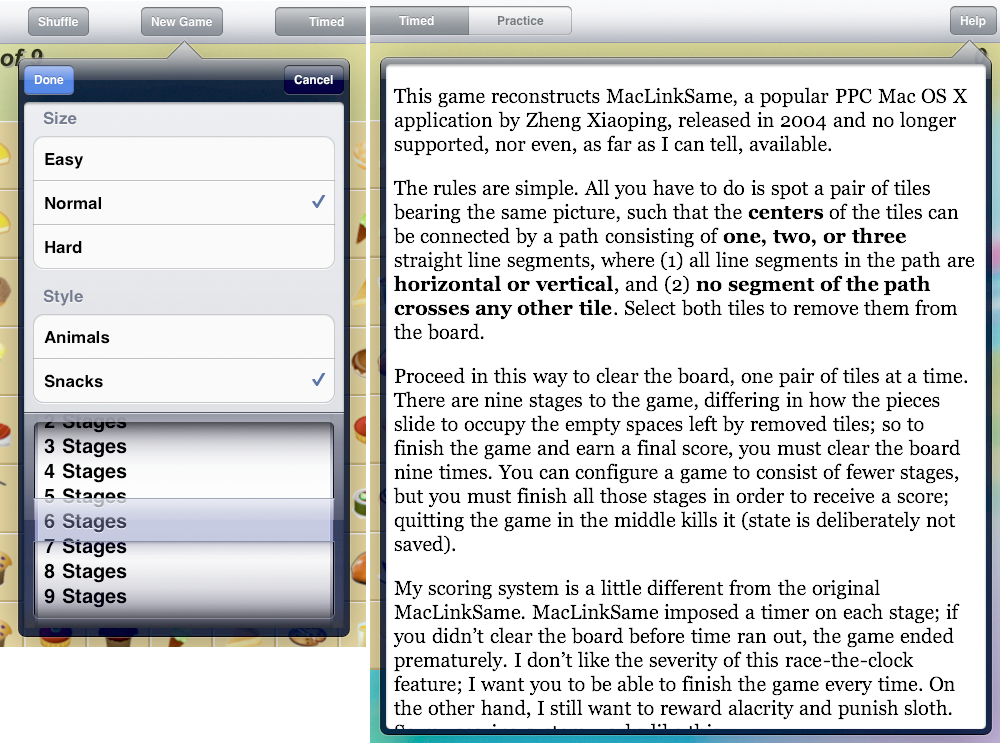
A popover, in effect, superimposes a roughly iPhone-sized screen on top of the iPad screen, and is useful in part precisely because it brings to the larger iPad the smaller, more lightweight flavor of the iPhone. For example, in my LinkSame app, both the settings view (where the user configures the game) and the help view (which describes how to play the game) are popovers (Figure 22.1). On the iPhone, both these views would occupy the entire screen; for each, we’d need a way to navigate to it, and then to return to the main interface when the user is finished with it. But with the larger iPad screen, neither view is large enough, or important enough, to occupy the entire screen exclusively. As popovers, these views are shown as what they are: smaller, secondary views which the user summons temporarily and then dismisses.
A split view (managed by a UISplitViewController) is a combination of two views, the first having the width of an iPhone screen in portrait orientation. When the iPad is in landscape orientation, the two views appear side by side. When the iPad is in portrait orientation, there are two possibilities:
- Only the second view appears, with an option to summon the first view by tapping a bar button item (or, optionally, by swiping to the right).
- Both views continue to appear side by side; the second view is narrower, because the screen is narrower.
Like popovers, a split view may be regarded as an evolutionary link between the smaller iPhone interface and the larger iPad interface. On the iPhone, you might have a master–detail architecture in a navigation interface, where the master view is a table view, and the detail view is a completely different view pushed onto the navigation stack in place of the master view (Chapter 21). On the iPad, the large screen can accommodate the master view and the detail view simultaneously; the split view is a built-in way to do that. It is no coincidence that the Master–Detail Application template in Xcode generates a navigation interface for the iPhone and a split view for the iPad.
Before iOS 5, UISplitViewController was the only legal way in which a single view controller could display the views of two child view controllers side by side. Nowadays, you are free to design your own custom parent view controllers (Chapter 19), so UISplitViewController is of diminished value. Nevertheless, it’s built-in and easy to use.
To display a popover, you’ll need a UIPopoverController, along with a view controller (UIViewController) whose view the popover will contain. UIPopoverController is not itself a UIViewController subclass. The view controller is the UIPopoverController’s contentViewController. You’ll set this property initially through UIPopoverController’s designated initializer, initWithContentViewController:. Subsequently, if you like, you can swap out a popover controller’s view controller (and hence its contained view) by calling setContentViewController:animated:.
Here’s how the UIPopoverController for the first popover in Figure 22.1 is initialized. I have a UIViewController subclass, NewGameController. NewGameController’s view contains a grouped table (whose code I showed you in Chapter 21) and a UIPickerView (see Chapter 11 and Chapter 25), and is itself the data source and delegate for both. I instantiate NewGameController and use this instance as the root view controller of a UINavigationController, giving its navigationItem a leftBarButtonItem (Done) and a rightBarButtonItem (Cancel). I don’t really intend to do any navigation, but the navigation controller’s navigation bar is a convenient way of adding the two buttons to the interface. That UINavigationController then becomes a UIPopoverController’s view controller:
NewGameController* dlg = [NewGameController new];
UIBarButtonItem* b = [[UIBarButtonItem alloc]
    initWithBarButtonSystemItem: UIBarButtonSystemItemCancel
                         target: self
                         action: @selector(cancelNewGame:)];
dlg.navigationItem.rightBarButtonItem = b;
b = [[UIBarButtonItem alloc]
    initWithBarButtonSystemItem: UIBarButtonSystemItemDone
                         target: self
                         action: @selector(saveNewGame:)];
dlg.navigationItem.leftBarButtonItem = b;
UINavigationController* nav =
    [[UINavigationController alloc] initWithRootViewController:dlg];
UIPopoverController* pop =
    [[UIPopoverController alloc] initWithContentViewController:nav];
That code doesn’t cause the popover to appear on the screen! I’ll come to that in a moment.
The popover controller needs to know the size of the view it is to display, which will be the size of the popover. The default popover size is {320,1100}; Apple would like you to stick to the default width of 320 (the width of an iPhone screen), but a maximum width of 600 is permitted, and the second popover in Figure 22.1 uses it. The popover’s height may be shorter than requested if there isn’t enough vertical space; the view to be displayed might need to be ready for such resizing.
You can provide the popover size in one of two ways:
-
UIPopoverController’s
popoverContentSizeproperty -
This property can be set before the popover appears; it can also be changed while the popover is showing, with
setPopoverContentSize:animated:. -
UIViewController’s
contentSizeForViewInPopoverproperty -
The UIViewController in question is the UIPopoverController’s
contentViewController(or is contained by that view controller, as in a tab bar interface or navigation interface). This approach often makes more sense, because a UIViewController will generally know its own view’s ideal size. If a view controller is to be instantiated from a nib or storyboard, this value can be set in the Attributes inspector.
In the case of the first popover in Figure 22.1, the NewGameController sets its own contentSizeForViewInPopover in viewDidLoad; its popover size is simply the size of its view:
self.contentSizeForViewInPopover = self.view.bounds.size;
The popover itself, however, will need to be somewhat taller, because the NewGameController is embedded in a UINavigationController, whose navigation bar occupies additional vertical space. Delightfully, the UINavigationController takes care of that automatically; its own contentSizeForViewInPopover adds the necessary height to that of its child view controller.
If the UIPopoverController and the UIViewController have different settings for their respective content size properties at the time the popover is initially displayed, the UIPopoverController’s setting wins. But once the popover is visible, if either property is changed, the change is obeyed; for example, if the UIViewController’s contentSizeForViewInPopover is changed (not merely set to the value it already has), the UIPopoverController adopts that value as its popoverContentSize and the popover’s size is adjusted accordingly.
If a popover’s contentViewController is a UINavigationController, and a view controller is pushed onto or popped off of its stack, then if the current view controller’s contentSizeForViewInPopover differs from that of the previously displayed view controller, my experiments suggest that the popover’s width will change to match the new width, but the popover’s height will change only if the new height is taller. This feels like a bug. A workaround is to implement the UINavigationController’s delegate method navigationController:didShowViewController:animated:, so as to set the navigation controller’s contentSizeForViewInPopover explicitly:
- (void)navigationController:(UINavigationController *)navigationController
       didShowViewController:(UIViewController *)viewController
                    animated:(BOOL)animated {
    navigationController.contentSizeForViewInPopover =
        viewController.contentSizeForViewInPopover;
}
(That workaround is not entirely satisfactory from a visual standpoint, as two animations succeed one another, but I tried implementing willShowViewController... instead and liked the results even less.)
The popover is made to appear on screen by sending the UIPopoverController one of the following messages (and the UIPopoverController’s popoverVisible property then becomes YES):
-
presentPopoverFromRect:inView:permittedArrowDirections:animated: -
presentPopoverFromBarButtonItem:permittedArrowDirections:animated:
The popover has a sort of triangular protrusion (called its arrow) on one edge, pointing to some region of the existing interface, from which the popover thus appears to emanate and to which it seems to be related. The difference between the two methods lies only in how this region is specified. With the first method, you can provide any CGRect with respect to any visible UIView’s coordinate system; for example, to make the popover emanate from a UIButton, you could provide the UIButton’s frame with respect to its superview, or (better) the UIButton’s bounds with respect to itself. But you can’t do that with a UIBarButtonItem, because a UIBarButtonItem isn’t a UIView and doesn’t have a frame or bounds; hence the second method is provided.
The permitted arrow directions restrict which sides of the popover the arrow can appear on. It’s a bitmask, and your choices are:
-
UIPopoverArrowDirectionUp -
UIPopoverArrowDirectionDown -
UIPopoverArrowDirectionLeft -
UIPopoverArrowDirectionRight -
UIPopoverArrowDirectionAny
Usually, you’d specify UIPopoverArrowDirectionAny, allowing the runtime to put the arrow on whatever side it feels is appropriate.
Even if you specify a particular arrow direction, you still have no precise control over a popover’s location. However, you do get some veto power: set the UIPopoverController’s popoverLayoutMargins to a UIEdgeInsets stating the margins, with respect to the root view bounds, within which the popover must appear. If an inset that you give is so large that the arrow can no longer touch the presenting rect, it may be ignored, or the arrow may become disconnected from its presenting rect; you probably shouldn’t do that.
The first popover in Figure 22.1 has a dark navigation bar even though no such thing was requested when the UINavigationController was created. This is because a popover whose content view controller is a navigation controller likes to take control of its navigation bar’s barStyle and set it to a special undocumented style, evidently to make it harmonize with the popover’s border. If you don’t like that, setting the navigation bar’s tintColor has no effect, but you can change its backgroundColor or its background image, and you can customize the position and appearance of its bar button items (Chapter 25).
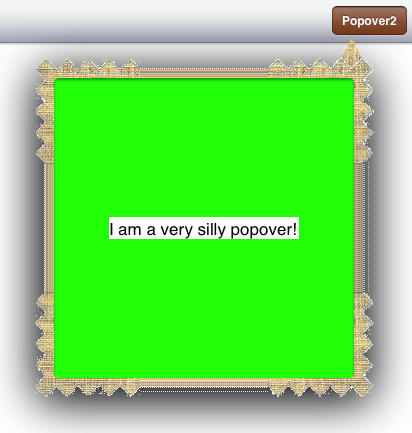
You can also customize the outside of the popover — that is, the “frame” and the arrow. To do so, you set the UIPopoverController’s popoverBackgroundViewClass to your subclass of UIPopoverBackgroundView (a UIView subclass) — at which point you can achieve just about anything you want, including the very silly popover shown in Figure 22.2.
Configuring your UIPopoverBackgroundView subclass is a bit tricky, because this single view is responsible for drawing both the arrow and the frame. Thus, in a complete and correct implementation, you’ll have to draw differently depending on the arrow direction, which you can learn from the UIPopoverBackgroundView’s arrowDirection property. I’ll give a simplified example in which I cheat by assuming that the arrow direction will be UIPopoverArrowDirectionUp. Then drawing the frame is easy: here, I divide the view’s overall rect into two areas, the arrow area on top (its height is a #defined constant, ARHEIGHT) and the frame area on the bottom, and draw the frame into the bottom area as a resizable image (Chapter 15):
UIImage* linOrig = [UIImage imageNamed: @"linen.png"];
CGFloat capw = linOrig.size.width / 2.0 - 1;
CGFloat caph = linOrig.size.height / 2.0 - 1;
UIImage* lin = [linOrig
    resizableImageWithCapInsets:UIEdgeInsetsMake(caph, capw, caph, capw)
                   resizingMode:UIImageResizingModeTile];
// ... draw arrow here ...
CGRect arrow;
CGRect body;
CGRectDivide(rect, &arrow, &body, ARHEIGHT, CGRectMinYEdge);
[lin drawInRect:body];
I omitted the drawing of the arrow; now let’s insert it. The UIPopoverBackgroundView has arrowHeight and arrowBase class methods that you’ve overridden to describe the arrow dimensions to the runtime. (In my code, their values are provided by two #defined constants, ARHEIGHT and ARBASE; I’ve set them both to 20.) My arrow will consist simply of a texture-filled isosceles triangle, with an excess base consisting of a rectangle joining it to the frame. The UIPopoverBackgroundView also has an arrowOffset property that the runtime has set to tell you where to draw the arrow: this offset measures the positive distance between the center of the view’s edge and the center of the arrow. However, the runtime will have no hesitation in setting the arrowOffset all the way at the edge of the view, or even beyond its bounds (in which case it won’t be drawn); to prevent this, I provide a maximum offset limit:
CGContextRef con = UIGraphicsGetCurrentContext();
CGContextSaveGState(con);
CGFloat proposedX = self.arrowOffset;
CGFloat limit = 22.0;
CGFloat maxX = rect.size.width/2.0 - limit;
if (proposedX > maxX)
    proposedX = maxX;
if (proposedX < limit)
    proposedX = limit;
CGContextTranslateCTM(con, rect.size.width/2.0 + proposedX - ARBASE/2.0, 0);
CGContextMoveToPoint(con, 0, ARHEIGHT);
CGContextAddLineToPoint(con, ARBASE / 2.0, 0);
CGContextAddLineToPoint(con, ARBASE, ARHEIGHT);
CGContextClosePath(con);
CGContextAddRect(con, CGRectMake(0,ARHEIGHT,ARBASE,15));
CGContextClip(con);
[lin drawAtPoint:CGPointMake(-40,-40)];
CGContextRestoreGState(con);
The thickness of the four sides of the frame is dictated by implementing the contentViewInsets class method. New in iOS 6, a class method wantsDefaultContentAppearance can be overridden to return NO if you’d like to turn off the subtle drop shadow cast by the frame on the popover contents.
Unlike a presented view controller or a child view controller, a UIPopoverController instance is not automatically retained for you by some presenting view controller or parent view controller; you must retain it yourself. If you fail to do this, then if the UIPopoverController goes out of existence while its popover is on the screen, your app will crash (with a helpful message: “-[UIPopoverController dealloc] reached while popover is still visible”). Also, you might need the retained reference to the UIPopoverController later, when the time comes to dismiss the popover.
There are actually two ways in which a popover can be dismissed: the user can tap outside the popover, or you can explicitly dismiss the popover (as I do with the first popover in Figure 22.1 when the user taps the Done button or the Cancel button). In order to dismiss the popover explicitly, you send its UIPopoverController the dismissPopoverAnimated: message. Obviously, then, you need a reference to the UIPopoverController.
Even if a popover is normally dismissed automatically by the user tapping outside it, you still might want to dismiss it explicitly on certain occasions — so you still might need a reference to the popover controller. For example, in keeping with the transient nature of popovers, I like to dismiss the current popover programmatically when the application undergoes certain strong transitions, such as going into the background or being rotated. (See also Apple’s technical note on what to do when the interface rotates while a popover is showing, QA1694, “Handling Popover Controllers During Orientation Changes.”) You can listen for the former by registering for UIApplicationDidEnterBackgroundNotification, and for the latter by implementing willRotateToInterfaceOrientation:duration:. This policy is not merely aesthetic; some view controllers, especially certain built-in specialized view controllers, recover badly from such transitions when displayed in a popover.
The obvious solution is an instance variable or property with a strong (retain) policy. The question then is how many such instance variables to use if we’re going to be displaying more than one popover. We could have an instance variable for each popover controller. On the other hand, a well-behaved app, in accordance with Apple’s interface guidelines, is probably never going to display more than one popover simultaneously; so a single UIPopoverController instance variable (we might call it currentPop) should suffice. This one instance variable could be handed a reference to the current popover controller each time we present a popover; using that reference, we would be able later to dismiss the current popover and release its controller.
An important feature of a popover’s configuration is whether and to what extent the user can operate outside it without automatically dismissing it. There are two aspects to this configuration:
-
UIPopoverController’s
passthroughViewsproperty -
This is an array of views in the interface behind the popover; the user can interact with these views while the popover is showing. What happens if the user taps a view that is not listed in the
passthroughViewsarray depends on themodalInPopoverproperty. -
UIViewController’s
modalInPopoverproperty -
If this is YES for the popover controller’s view controller (or for its current child view controller, as in a tab bar interface or navigation interface), then if the user taps outside the popover on a view not listed in the popover controller’s
passthroughViews, nothing at all happens.If it is NO (the default), then if the user taps outside the popover on a view not listed in the popover controller’s
passthroughViews, the view tapped on is unaffected, and the popover is dismissed.
Warning
The claim made by the documentation (and by previous editions of this book) that modalInPopover prevents all user interaction outside a popover is wrong. The user can still interact with a view listed in the passthroughViews even if modalInPopover is YES.
You should pay attention to the passthroughViews, as the default behavior may be undesirable. For example, if a popover is summoned by the user tapping a UIBarButton item in a toolbar using presentPopoverFromBarButtonItem:..., the entire toolbar is a passthrough view; this means that the user can tap any button in the toolbar, including the button that summoned the popover. The user can thus by default summon the popover again while it is still showing, which is certainly not what you want. I like to set the passthroughViews to nil; at the very least, while the popover is showing, you should probably disable the UIBarButtonItem that summoned it.
Warning
Setting a UIPopoverController’s passthroughViews might not have any effect unless the UIPopoverController has already been sent presentPopover....
We are now ready for a rigorous specification of the two ways in which a popover can be dismissed:
-
The popover controller’s view controller’s
modalInPopoveris NO, and the user taps outside the popover on a view not listed in the popover controller’spassthroughViews.The UIPopoverController’s delegate (adopting the UIPopoverControllerDelegate protocol) is sent
popoverControllerShouldDismissPopover:; if it doesn’t return NO (which might be because it doesn’t implement this method), the popover is dismissed, and the delegate is sentpopoverControllerDidDismissPopover:. -
The UIPopoverController is sent
dismissPopoverAnimated:by your code; the delegate methods are not sent in that case.
Because a popover can be dismissed in two different ways, if you have a cleanup task to perform as the popover vanishes, you may have to see to it that this task is performed under two different circumstances. That can get tricky.
To illustrate, I’ll describe what happens when the first popover in Figure 22.1 is dismissed. Within this popover, the user is interacting with several settings in the user defaults. But if the user taps Cancel, or if the user taps outside the popover (which I take to be equivalent to canceling), I want to revert those defaults to the way they were before the popover was summoned. So, as I initially present the popover, I preserve the relevant current user defaults as an ivar:
// save defaults so we can restore them later if user cancels
self.oldDefs =
    [[NSUserDefaults standardUserDefaults]
        dictionaryWithValuesForKeys: @[@"Style", @"Size", @"Stages"]];
The user now works within the popover. Any settings that the user changes within the popover are immediately saved into the user defaults. So, if the user then taps Done, the user’s settings within the popover have already been saved; I explicitly dismiss the popover and proceed to initiate the new game that the user has asked for:
- (void) saveNewGame: (id) sender { // done button in New Game popover
    [self.currentPop dismissPopoverAnimated:YES];
    self.currentPop = nil;
    // ... set up new game interface, initialize scores, etc. ...
}
On the other hand, if the user taps Cancel, I must revert the user defaults as I dismiss the popover:
- (void) cancelNewGame: (id) sender { // cancel button in New Game popover
    [self.currentPop dismissPopoverAnimated:YES];
    self.currentPop = nil;
    [[NSUserDefaults standardUserDefaults]
        setValuesForKeysWithDictionary:self.oldDefs];
}
But I must also do the same thing if the user taps outside the popover to dismiss it. Therefore I implement the delegate method to detect this, and revert the user defaults again:
- (void)popoverControllerDidDismissPopover:(UIPopoverController *)pc {
    [[NSUserDefaults standardUserDefaults]
        setValuesForKeysWithDictionary:self.oldDefs];
    self.currentPop = nil;
}
My app, however, has another popover (the second popover in Figure 22.1). This popover, too, can be dismissed by the user tapping outside it; in fact, that’s the only way the user can dismiss it. If this same class is also that second popover controller’s delegate, then this same popoverControllerDidDismissPopover: will be called. But now we don’t want to call setValuesForKeysWithDictionary:; it’s the wrong popover, and we have no preserved defaults to revert. So I must somehow test for which popover controller is being passed in as the parameter to popoverControllerDidDismissPopover:. But how can I distinguish one popover controller from another? Luckily, my popover controllers have different types of view controller:
- (void)popoverControllerDidDismissPopover:(UIPopoverController *)pc {
    if ([pc.contentViewController isKindOfClass:
            [UINavigationController class]])
        [[NSUserDefaults standardUserDefaults]
            setValuesForKeysWithDictionary:self.oldDefs];
    self.currentPop = nil;
}
(If I had two different popovers each of which had a UINavigationController as its view controller, I’d need some other way of distinguishing them. For example, I might have to subclass UIPopoverController just so I could tell one popover controller from another by examining its class.)
I also want to dismiss any currently displayed popover if the interface rotates, or if the app goes into the background. Clearly this should count as canceling the popover; the user’s changes must not be saved, as the user didn’t tap Done. Dismissing a popover manually doesn’t trigger a delegate event, so I must perform all the same tests again:
-(void)willRotateToInterfaceOrientation:(UIInterfaceOrientation)io
        duration:(NSTimeInterval)duration {
    UIPopoverController* pc = self.currentPop;
    if (pc) {
        if ([pc.contentViewController isKindOfClass:
                [UINavigationController class]])
            [[NSUserDefaults standardUserDefaults]
                setValuesForKeysWithDictionary:self.oldDefs];
        [pc dismissPopoverAnimated:NO];
        self.currentPop = nil;
    }
}

-(void)backgrounding:(id)dummy {
    UIPopoverController* pc = self.currentPop;
    if (pc) {
        if ([pc.contentViewController isKindOfClass:
                [UINavigationController class]])
            [[NSUserDefaults standardUserDefaults]
                setValuesForKeysWithDictionary:self.oldDefs];
        [pc dismissPopoverAnimated:NO];
        self.currentPop = nil;
    }
}
The need for all this testing and duplicated functionality, just to display a couple of popovers, suggests to me that the framework’s implementation of popover management is flawed. Only one popover is supposed to be showing at a time, so why doesn’t the shared application at least maintain a reference to its controller for you, and maybe even (gasp) manage its memory for you? Why do popover controllers come into existence with their passthrough views set to anything but nil? Why doesn’t a content view controller have a reference to the popover controller, the way it has a reference to an ancestral navigation controller? Why don’t popover controllers have a name or other identifier so you can tell them apart? Don’t get me started.
A popover can present a view controller internally; you’ll specify a modalPresentationStyle of UIModalPresentationCurrentContext, because otherwise the presented view will be fullscreen by default. You’ll also specify a transition style of UIModalTransitionStyleCoverVertical — with any other transition style, your app will crash with this message: “Application tried to present inside popover with transition style other than UIModalTransitionStyleCoverVertical.” The presented view controller’s modalInPopover is automatically set to YES. (You can subvert this by setting the presented view controller’s modalInPopover to NO after it is presented, but you probably shouldn’t.)
If a presented view inside a popover proves troublesome — I’ve encountered some bugs connected with this arrangement — I suggest trying an alternative interface, such as replacing the popover controller’s view controller with a different view controller.
In an iPad storyboard, a segue can be designated a popover segue, by choosing Popover from the Style pop-up menu in the Attributes inspector. The consequences of doing so are:
- When the segue is triggered, a popover is displayed. The runtime constructs a UIPopoverController and makes the segue’s destination view controller the UIPopoverController’s content view controller. The popover’s “anchor” (the view or bar button item to which its arrow points) is the source object from which you control-drag to form the segue, or it can be set in the Attributes inspector.
-
The segue is a UIStoryboardPopoverSegue, a UIStoryboardSegue subclass that adds a single read-only property,
popoverController. You can use this, for instance, inprepareForSegue:sender:, to customize the popover controller. - An unwind segue from within the popover’s content view controller dismisses the popover.
The UIPopoverController created by the triggering of a popover segue is retained behind the scenes; the app does not crash if you fail to retain it explicitly yourself. Nevertheless, you may still wish to retain your own reference to the popover controller, in order to know that a popover is being displayed, in order to dismiss it in code, and so forth. You’ll probably obtain that reference in your prepareForSegue:sender: implementation.
Popover segues sound tempting, but they do not appreciably reduce the amount of code required to configure and manage a popover. Consider, for example, the code I cited earlier for creating a popover controller whose view controller is a navigation view controller:
NewGameController* dlg = [NewGameController new];
UIBarButtonItem* b = [[UIBarButtonItem alloc]
    initWithBarButtonSystemItem: UIBarButtonSystemItemCancel
                         target: self
                         action: @selector(cancelNewGame:)];
dlg.navigationItem.rightBarButtonItem = b;
b = [[UIBarButtonItem alloc]
    initWithBarButtonSystemItem: UIBarButtonSystemItemDone
                         target: self
                         action: @selector(saveNewGame:)];
dlg.navigationItem.leftBarButtonItem = b;
UINavigationController* nav =
    [[UINavigationController alloc] initWithRootViewController:dlg];
UIPopoverController* pop =
    [[UIPopoverController alloc] initWithContentViewController:nav];
In a storyboard, you could create a popover segue to a navigation controller whose root view is a NewGameController, and you could create the bar button items in the storyboard. So that code has been eliminated. But now how would you hook up the NewGameController’s bar button items to make their actions call the correct methods in self? You can’t do that in the storyboard, because you can’t make an action connection from within one scene to something in a different scene. So you’d need some new code: in prepareForSegue:sender:, you’d have to work your way down from the navigation controller to the NewGameController and its bar button items, and hook up their target and action:
UINavigationController* nav = segue.destinationViewController;
UIViewController* vc = nav.childViewControllers[0];
vc.navigationItem.leftBarButtonItem.target = self;
vc.navigationItem.leftBarButtonItem.action = @selector(savePop1:);
vc.navigationItem.rightBarButtonItem.target = self;
vc.navigationItem.rightBarButtonItem.action = @selector(cancelPop1:);
Similarly, how would you set a popover controller’s passthroughViews to nil when the popover controller is generated by a popover segue? You can’t do that in the storyboard, so you’d have to do it in prepareForSegue:sender:. But prepareForSegue:sender: is too soon; you need to do this after the popover has been displayed, and you don’t get any event notifying you of that. So you’d have to use some form of delayed performance:
UIStoryboardPopoverSegue* seg = (id)segue;
UIPopoverController* pop = seg.popoverController;
[CATransaction setCompletionBlock:^{ pop.passthroughViews = nil; }];
Finally, as I mentioned earlier, you might still need to maintain a reference to the UIPopoverController (pop in the above code), set yourself as its delegate, and configure any other features of the popover controller such as its popoverLayoutMargins and popoverBackgroundViewClass, just as you would have done if there were no storyboard at all. Personally, I’d rather create the popover controller in code to begin with.
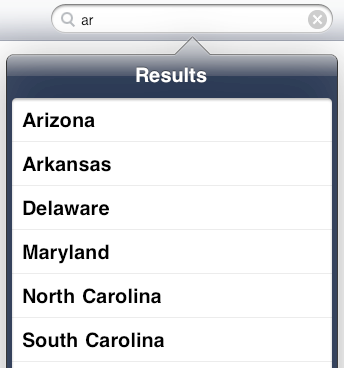
In a few situations, the framework will automatically create and display a popover for you. One such situation is what happens when a search bar (a UISearchBar) tied to a search display controller (UISearchDisplayController) appears in a toolbar (UIToolbar) on the iPad. Recall the search display controller example from Chapter 21, where we search a list of the 50 United States; I’ll modify that example to demonstrate. In the nib editor, start with a toolbar at the top of the root view, and drag into it the combined Search Bar and Search Display Controller object from the Object library. This causes a whole bunch of outlets to be configured automatically:
- The search bar’s delegate is the File’s Owner.
-
The File’s Owner’s
searchDisplayControlleris the search display controller. This is a UIViewController property that I didn’t mention in Chapter 21, because its worth is not clear when a UISearchDisplayController is created and configured in code. When a UISearchDisplayController is instantiated from a nib, however, this property is an outlet that retains the search display controller, as well as providing access to it in code. - The search display controller’s search bar is the search bar.
-
The search display controller’s delegate,
searchContentsController,searchResultsDataSource, andsearchResultsDelegateare the File’s Owner. Of these, only the latter two appear to be of importance in this example.
Now for the code. When our view controller loads its view, we also load the model (the list of states) into an NSArray property called states. We also have an NSArray property called filteredStates. Here is the code for dealing with the search bar and the search display controller’s results table:
-(void)searchDisplayController:(UISearchDisplayController *)controller
        didLoadSearchResultsTableView:(UITableView *)tableView {
    [tableView registerClass:[UITableViewCell class]
      forCellReuseIdentifier:@"cell"];
}

- (NSInteger)numberOfSectionsInTableView:(UITableView *)tableView {
    return 1;
}

- (NSInteger)tableView:(UITableView *)tableView
        numberOfRowsInSection:(NSInteger)section {
    return [self.filteredStates count];
}

- (UITableViewCell *)tableView:(UITableView *)tableView
         cellForRowAtIndexPath:(NSIndexPath *)indexPath {
    UITableViewCell *cell =
        [tableView dequeueReusableCellWithIdentifier:@"cell"
                                        forIndexPath:indexPath];
    cell.textLabel.text = self.filteredStates[indexPath.row];
    return cell;
}

- (void) filterData {
    NSString* target = self.searchDisplayController.searchBar.text;
    NSPredicate* p = [NSPredicate predicateWithBlock:
     ^(id obj, NSDictionary *d) {
         NSString* s = obj;
         NSStringCompareOptions options = NSCaseInsensitiveSearch;
         BOOL b =
            [s rangeOfString:target options:options].location != NSNotFound;
         return b;
     }];
    self.filteredStates = [states filteredArrayUsingPredicate:p];
}

- (void)searchBar:(UISearchBar *)searchBar
        textDidChange:(NSString *)searchText {
    [self filterData];
}
That’s all. There is no mention anywhere of a UIPopoverController. Nevertheless, when the user enters text in the search bar, a popover appears, containing a table of search results (Figure 22.3). The “Results” title at the top of the popover can be changed by setting the UISearchDisplayController’s searchResultsTitle property; you can also do this in the nib editor. Also, the search bar contains a results list button that summons the popover when tapped, and in that case the popover’s top bar contains a Clear button that empties the search bar and dismisses the popover; that behavior is apparently entirely automatic and due to the search display controller. Unfortunately, however, you get no official access to the UIPopoverController itself, so you can’t set its passthrough views and so on.
Another example of an automatic popover on the iPad is the alert sheet, discussed in Chapter 26.
A split view is implemented through a UISplitViewController (a UIViewController subclass) whose children are the two UIViewControllers whose views are to be displayed in the two regions of the split view. You provide the children through the UISplitViewController’s viewControllers property (an NSArray); it can be configured in code or in a nib. A UIViewController that is a child, at any depth, of a UISplitViewController has a reference to the UISplitViewController through its splitViewController property.
There is very little work for you to do with regard to a split view controller. You can hear about what the split view controller is doing through its delegate (adopting the UISplitViewControllerDelegate protocol), which receives these messages:
-
splitViewController:willHideViewController:withBarButtonItem:forPopoverController: -
The split view is rotating to portrait orientation, so it’s hiding the first view. The split view controller creates a UIBarButtonItem and hands it to you as the third parameter. The split view controller has already set things up so that if the user taps this bar button item, a popover will be presented through the popover controller (fourth parameter) displaying the view of the first view controller (second parameter). Your mission, should you decide to accept it, is to put that bar button item into the interface, typically in a toolbar at the top of the second view. You are free to configure the bar button item’s appearance as you do so.
It’s common practice to keep a reference to the popover controller, in case you need it in order to dismiss the popover later (but don’t set its delegate).
If an app with a split view interface launches into portrait orientation, this delegate method is called.
-
splitViewController:popoverController:willPresentViewController: - The user has tapped the bar button item you were handed in the first delegate method, and the popover is about to appear. You probably won’t need to implement this method.
-
splitViewController:willShowViewController:invalidatingBarButtonItem: - This is the opposite of the first delegate method: the split view is rotating to landscape orientation, so the split view controller going to break the connection between the bar button item and the popover controller and is going to put the first view back into the interface. You should remove the bar button item from the interface.
Let’s focus on the words “put that bar button item into the interface” and “remove the bar button item from the interface.” How you do this depends on your interface. The current version of the iPad Master–Detail Application project template, which demonstrates a split view interface, uses a navigation interface in order to get the navigation bar:
DetailViewController *detailViewController =
    [[DetailViewController alloc]
        initWithNibName:@"DetailViewController" bundle:nil];
UINavigationController *detailNavigationController =
    [[UINavigationController alloc]
        initWithRootViewController:detailViewController];
As a result, the DetailViewController instance, functioning as the UISplitViewController’s delegate, gets the bar button item into and out of the interface by setting its own navigationItem’s leftBarButtonItem:
- (void)splitViewController:(UISplitViewController *)splitController
     willHideViewController:(UIViewController *)viewController
          withBarButtonItem:(UIBarButtonItem *)barButtonItem
       forPopoverController:(UIPopoverController *)popoverController
{
    [self.navigationItem setLeftBarButtonItem:barButtonItem animated:YES];
    self.masterPopoverController = popoverController;
}

- (void)splitViewController:(UISplitViewController *)splitController
     willShowViewController:(UIViewController *)viewController
  invalidatingBarButtonItem:(UIBarButtonItem *)barButtonItem
{
    [self.navigationItem setLeftBarButtonItem:nil animated:YES];
    self.masterPopoverController = nil;
}
In addition, you might want to set the bar button item’s title in willHide...; by default, it will be the first view controller’s title.
If you ask for a main storyboard as you generate your iPad project from the Master–Detail Application project template, you can see how little code is required to implement a working split view. The split view controller is hooked to its child view controllers by relationships in the storyboard; those child view controllers are navigation controllers, and are themselves hooked to their root view controllers by relationships in the storyboard as well. Thus, all five view controllers are instantiated together, automatically, as the app launches.
The only thing that can’t be configured in the storyboard is the delegate relationship between the UISplitViewController and the DetailViewController; they are both in the storyboard together, but they’re in difference scenes, so no outlet can be drawn between them. To solve this, the template includes the following code in the app delegate’s application:didFinishLaunchingWithOptions::
UISplitViewController *splitViewController =
    (UISplitViewController *)self.window.rootViewController;
UINavigationController *navigationController =
    [splitViewController.viewControllers lastObject];
splitViewController.delegate = (id)navigationController.topViewController;
By the time that code runs, the window’s rootViewController has been set and all the view controllers are in place, in their various parent–child relationships; the code is thus able to work its way through the parent–child hierarchy to get references to the two desired view controllers and can make the one the delegate of the other. The DetailViewController implements the two UISplitViewControllerDelegate methods to add and remove the UIBarButtonItem in the navigation bar, just as in the nonstoryboard template.
The storyboard editor also provides a Replace segue for use in connection with a split view. This allows either of the split view controller’s child view controllers to be swapped out. A typical use is that the user taps something in the left (master) view controller to cause the right (detail) view controller to be replaced by a different view controller. So you’d create a Replace segue leading from the tapped thing in the master view controller to the new view controller, and specify a Destination of Detail Split.
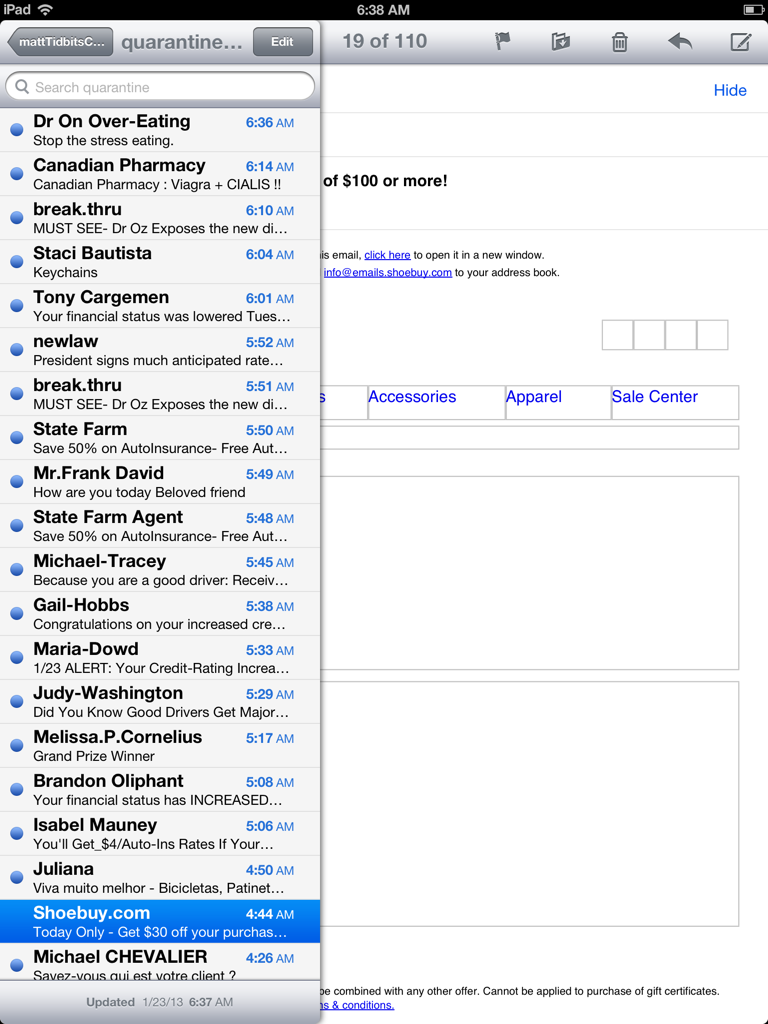
I’ve been using the word “popover” because that’s what the delegate methods call it — and, in iOS 5.0 and before, it really was a popover like any other. Starting in iOS 5.1, however, the interface changed radically. If this is a popover, it’s a very strange-looking popover. It has no border and no arrow, and is the height of the screen; when summoned, it slides in from the left, and if the device is rotated it does a smooth animation and becomes the view on the left side of the screen. Apple’s Mail application is a familiar example (Figure 22.4).
I suspect that this is a popover in name only. There is a popover controller, and it emits delegate messages; thus, the API remains unchanged, and split view controller code from before iOS 5.1 continues to work. But in reality the popover programming interface is probably a cover for something else entirely. Indeed, in the previous edition of this book, when Apple Mail had introduced the new interface shown in Figure 22.4 but the split view available to programmers through iOS was still using a normal popover, I provided reverse-engineered code showing how to achieve the Mail interface with a custom container controller.
If the UISplitViewController’s presentsWithGesture is YES, the second view in portrait orientation will detect a rightward swipe and will respond by summoning the first view (the popover). Otherwise, the bar button item will be the only way to summon the popover in portrait orientation.
It is also possible for a split view interface not to hide the first view in portrait orientation. Instead, the left and right view both appear in both orientations; the left view’s width is unchanged, while the right view is resized appropriately. (Compare Apple’s Settings app on the iPad.) To get that behavior, implement this delegate method:
-
splitViewController:shouldHideViewController:inOrientation: - Allows the left view controller to be hidden (return YES) or not (return NO) as the interface rotates to the given orientation. If you return NO, the other delegate methods won’t be called in this orientation; there will be no bar button item and no popover.